Creating a compact living space has become more than a trend—it’s a lifestyle shift. When I decided to design my own dwelling, I wanted more than just affordability. I sought complete customization and the freedom to shape every detail. This journey starts with understanding what defines these structures: any residence under 600 square feet qualifies, with most in the U.S. averaging 225 square feet.
The financial benefits are undeniable. Traditional homes cost nearly 87% more, while constructing a personalized space typically ranges from $30,000 to $60,000. My choice to develop on existing acreage instead of opting for wheels came down to long-term stability and local zoning flexibility. Unlike mobile options, a permanent foundation allows for tailored utilities and expanded design possibilities.
Through this guide, I’ll walk you through each phase—from securing permits to selecting materials. Whether you’re considering a DIY approach or working with professionals, the process demands careful planning. Let’s explore how to transform your vision into a functional, efficient living area that reflects your priorities.
Key Takeaways
- Structures under 600 square feet offer significant cost savings compared to traditional homes
- Average construction costs range from $30,000 to $60,000, with luxury options exceeding $150,000
- Custom-built designs provide greater control over layout and energy-efficient features
- Permanent foundations enable compliance with local regulations and access to utilities
- Multiple construction methods exist, including DIY projects, contractor partnerships, and prefabricated kits
Introduction: My Motivation for Tiny House Living
The turning point came when I realized my large home no longer served my needs. After my children moved out, maintaining empty rooms felt wasteful. Downsizing to a cohesive space became inevitable—and surprisingly liberating.
Financial freedom drove much of my decision. Traditional homes drained $2,800 monthly between mortgage and utilities. Compare that to my current setup:
| Expense Category | Traditional Home | Tiny Home |
|---|---|---|
| Mortgage/Lease | $1,900 | $0 (owned) |
| Utilities | $600 | $120 |
| Maintenance | $300 | $50 |
| Customization Costs | Limited | Full control |
Beyond numbers, I craved simplicity. Owning fewer possessions meant less stress. Solar panels and composting systems aligned with my eco-values—something standard houses rarely accommodate.
What surprised me most? The community. Tiny living enthusiasts share tips on space optimization and off-grid solutions. Through local meetups, I’ve connected with people prioritizing experiences over square footage.
This lifestyle isn’t about sacrifice. It’s designing a purpose-driven environment where every cabinet and window serves multiple roles. My compact dwelling reflects who I am—not what society expects.
Planning My Tiny House Design
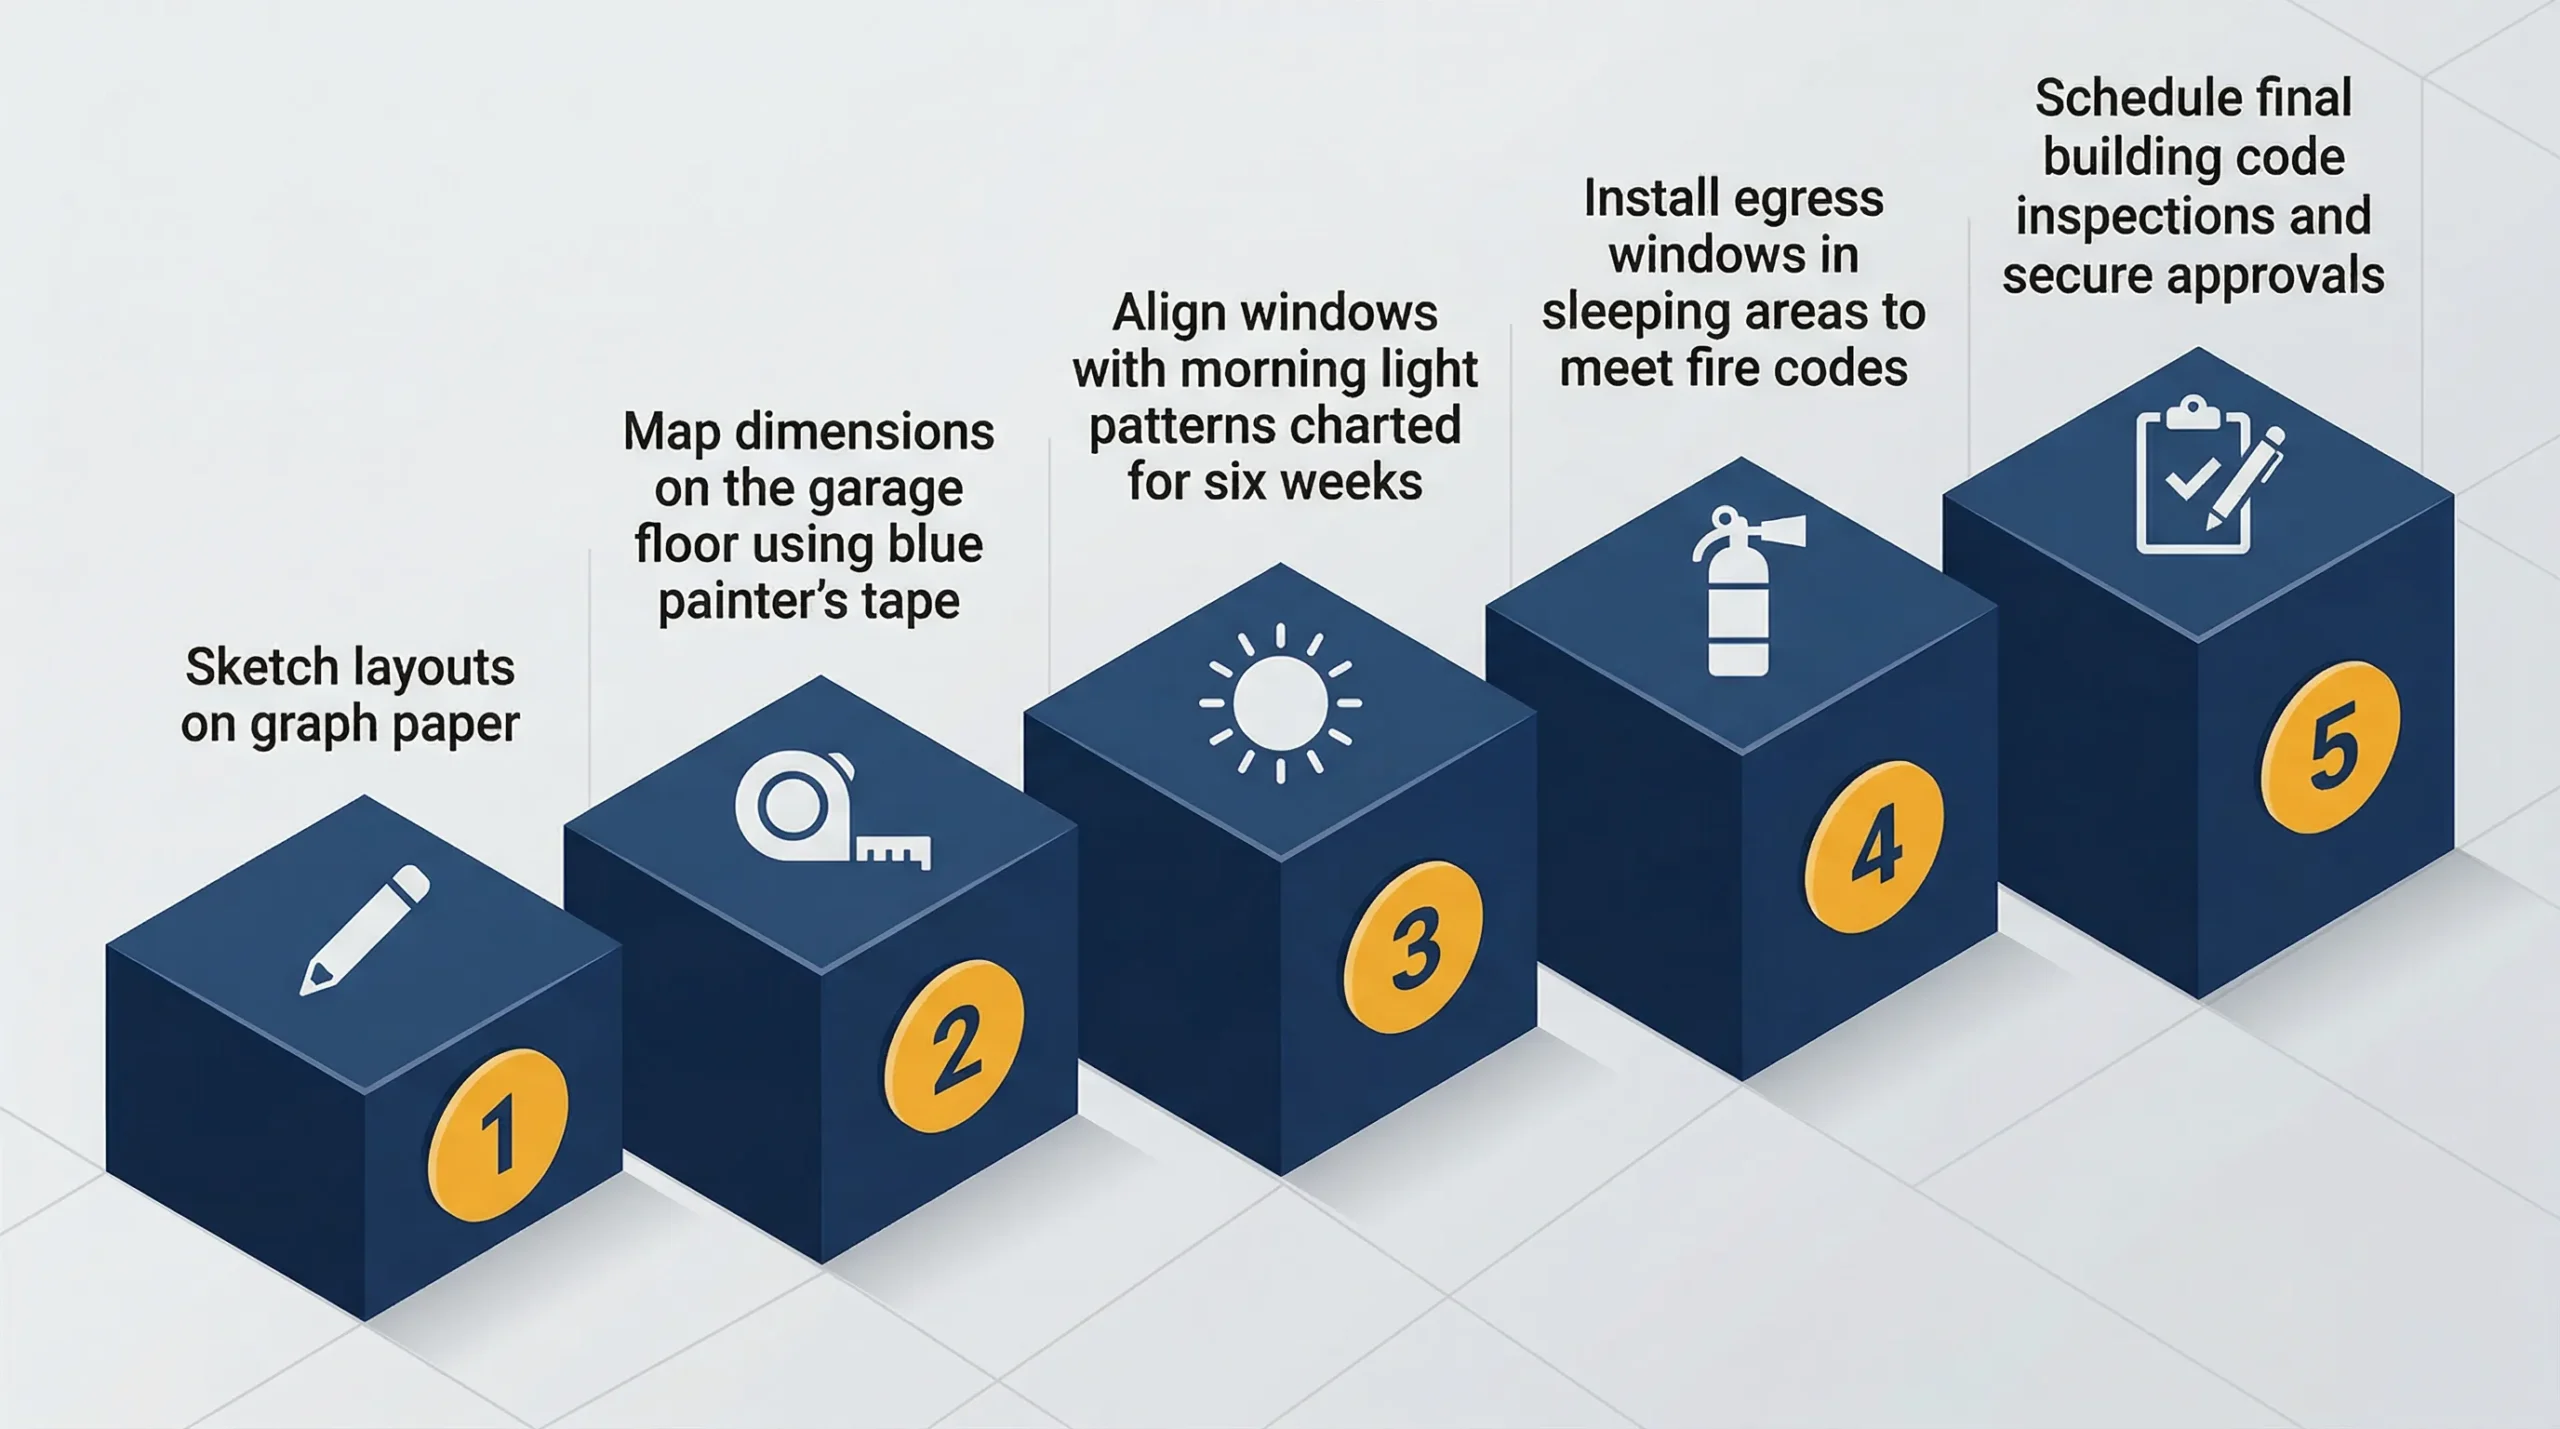
Designing my compact dwelling began with graph paper and painter’s tape. I sketched three layouts before realizing paper plans don’t show real spatial challenges. That’s when I started mapping dimensions on my garage floor.

Designing an Efficient Floor Plan
Blue painter’s tape became my best tool. I marked 10’x12′ rectangles to represent critical areas. Standing in the taped kitchen zone revealed I needed 14\” more counter space than planned. Every inch matters when working with 225 square feet.
Room placement followed utility logic. The shower sits beside the composting toilet to share plumbing lines. My sleeping loft floats above the living area, accessed via space-saving alternating tread stairs. Windows align with morning light patterns I charted for six weeks.
Prioritizing Safety, Comfort, and Accessibility
Safety features shaped key decisions. Egress windows in sleeping areas meet fire codes. Smoke detectors flank the cooking space and loft. I doubled structural studs near roof connections for snow load capacity.
Comfort came through clever compromises. My fold-down desk becomes a dining table. Magnetic wall panels hold spices above the induction cooktop. Pocket doors separate private zones without eating floor space.
Future-proofing influenced door widths and handle choices. All entries accommodate 32\” mobility devices. Lever-style handles work for arthritic hands. These choices let me age in place without major renovations.
Selecting the Ideal Land for Your Tiny Home
Securing the right location felt like solving a complex puzzle. While scrolling through listings, I discovered land availability shrinks dramatically near urban centers. My search radius expanded three times before finding viable options.

Buying Land vs. Exploring Alternative Options
Purchasing undeveloped acreage required navigating strict loan requirements. Banks demanded 35% down payments for raw land—nearly double traditional mortgage deposits. My breakthrough came through seller financing with a 10-year contract.
For a sustainable and affordable living option, explore our Nevada County tiny house community for inspiration and a place to call home.
Alternative routes proved more accessible:
- ADU placements on established properties bypassed permit headaches
- Rental agreements with relatives provided temporary solutions
- Co-op land shares split costs among four households
Utilizing Accessory Dwelling Units and Rentals
ADUs became my safety net. These secondary structures use existing utility hookups, saving $18,000 in infrastructure costs. When interviewing homeowners, one shared: \”Our garage conversion took six weeks and required zero new permits.\”
| Option | Cost Range | Approval Time |
|---|---|---|
| Land Purchase | $45k-$120k | 4-9 months |
| ADU Lease | $300-$800/month | 2-6 weeks |
| Shared Lot | $150-$400/month | 1-3 months |
Leveraging Community Resources and Local Listings
Facebook groups like \”Tiny Living Land Connect\” revealed off-market opportunities. I set Zillow alerts for properties under 0.25 acres with water access. Three critical filters narrowed my search:
- Existing electrical hookups within 200 feet
- Minimum 12-month lease terms for rentals
- Zoning codes allowing permanent foundations
Through local tiny home meetups, I found a retired couple offering backyard space. Their suburban lot met all my needs while providing unexpected gardening mentorship.
Building Tiny House on Land: Step-by-Step Guide
Breaking ground required balancing ambition with practicality. My first choice – foundation versus wheels – shaped every subsequent decision. Permanent bases allow customized layouts but demand strict code compliance. Mobile designs offer relocation flexibility yet limit structural complexity.

Outlining the Construction Process
I divided my project into seven phases after consulting three contractors. Material sourcing proved most challenging – I created backup options for every component. This table shows how my foundation-based approach differed from wheeled alternatives:
| Factor | Foundation | Wheels |
|---|---|---|
| Permit Requirements | Full residential | RV classification |
| Wall Height | 12′ maximum | 13’6\” limit |
| Utility Connections | Permanent | Flexible |
| Construction Timeline | 14 weeks | 9 weeks |
Weekly progress checks kept tasks aligned. I sequenced work to match material deliveries – roofing arrived just as walls reached completion. Digital spreadsheets tracked 83 separate components, with color coding for delayed items.
Addressing Critical Construction Considerations
Structural integrity demanded extra attention in my snowy climate. I doubled roof trusses and used hurricane ties on every rafter. Moisture management guided material choices – cement board siding outperformed vinyl in durability tests.
Three documentation methods preserve my work:
- Time-stamped photo logs for each construction phase
- Warranty files organized by supplier
- Code inspection certificates scanned to cloud storage
Weight distribution became crucial when installing appliances. Moving the water heater 18 inches forward balanced the load perfectly. These adjustments transformed my design from theoretical plans to livable reality.
Navigating Zoning Laws, Permits, and Building Codes
My journey through regulatory requirements began with an eye-opening discovery: 72% of U.S. counties lack clear guidelines for compact dwellings. This gray area forced me to become fluent in municipal jargon and zoning maps.

Understanding Local Zoning Regulations
I spent three weeks decoding my county’s 400-page land use document. Minimum size mandates proved the biggest hurdle—many neighborhoods required primary residences over 1,000 square feet. Through public records requests, I uncovered a loophole for accessory units under 600 square feet.
Key challenges included:
- Setback requirements reducing usable space by 18%
- Parking mandates for \”non-primary dwellings\”
- Utility connection rules favoring traditional construction
Acquiring Permits and Handling Variances
The permit process required 14 documents, including stamped engineering plans. Fees totaled $1,842—mid-range for my area. When my roof design conflicted with snow load codes, I negotiated a variance by demonstrating reinforced truss engineering.
| Requirement | Standard | My Solution |
|---|---|---|
| Foundation Depth | 42\” frost line | Insulated slab |
| Egress Windows | 5.7 sq ft | Custom skylight combo |
| Electrical Inspection | 3-phase test | Pre-certified system |
Building officials initially questioned my composting toilet system. By providing NSF/ANSI certification documents, I turned skepticism into approval. Monthly check-ins maintained rapport throughout the 11-month process.
Regional variations shocked me—a neighboring county banned all structures under 800 square feet. This experience taught me: always verify codes with planning department staff, not just online resources.
Budgeting and Financing My Tiny Home Project

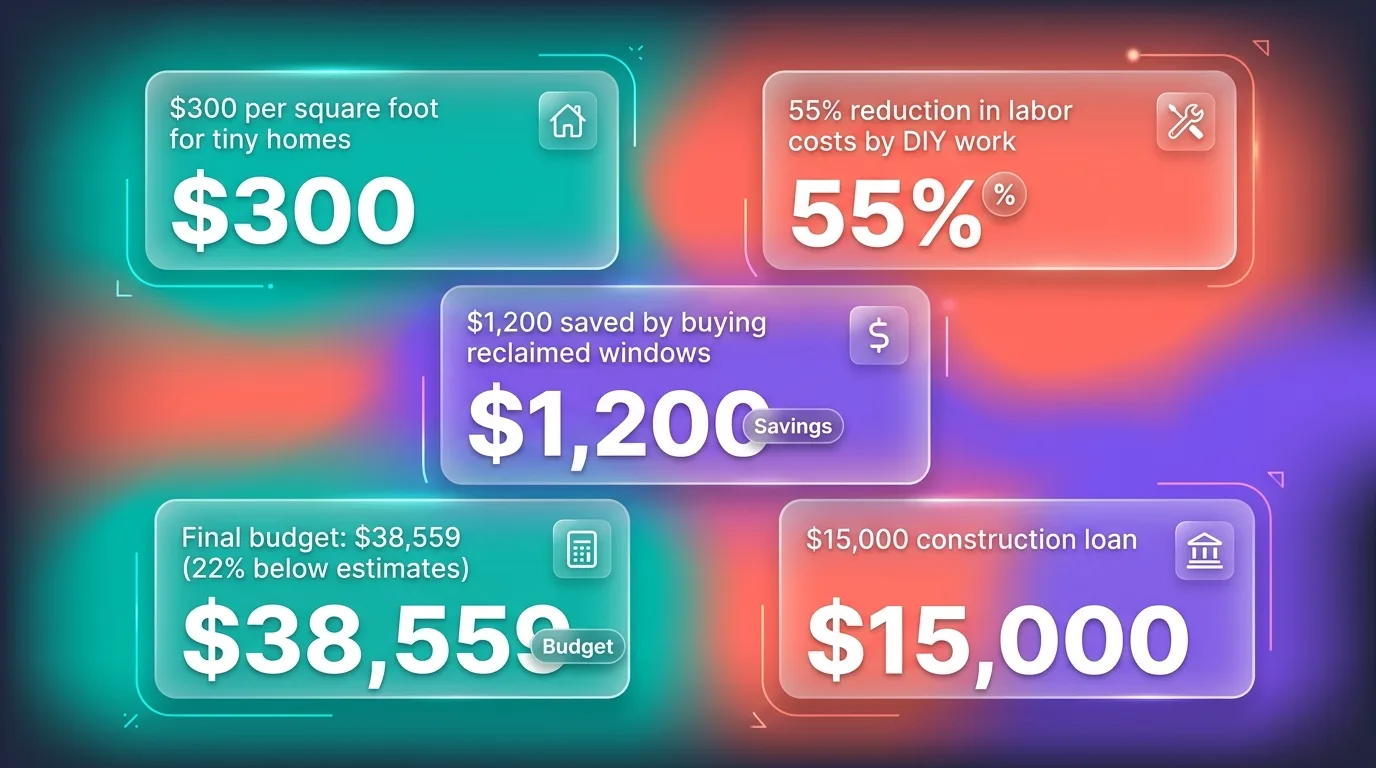
Crunching numbers became my new survival skill when planning this endeavor. Unlike traditional home projects, every dollar carried triple weight in my 225-square-foot space. I started by dissecting industry averages—$300 per square foot versus $150 for conventional houses—then built my financial blueprint.
Setting an Accurate Budget
My spreadsheet had 27 categories, from foundation gravel to cabinet handles. Labor costs shocked me initially—contractors quoted $45,000 for full builds. By handling electrical and finish work myself, I slashed that figure by 55%.
| Category | Allocation | Actual Spend |
|---|---|---|
| Materials | $28,000 | $26,400 |
| Labor | $20,000 | $9,100 |
| Permits | $2,500 | $1,842 |
| Contingency | $5,000 | $3,217 |
Exploring Financing Options and Cost-Saving Tips
Local credit unions offered the best financing options for non-traditional dwellings. I combined a $15,000 construction loan with personal savings. Three strategies kept costs manageable:
- Bought reclaimed windows from architectural salvage ($1,200 saved)
- Timed lumber purchases during winter price drops
- Used contractor-grade appliances instead of residential models
My final budget landed at $38,559—22% below initial estimates. This project taught me that financial creativity matters as much as construction skills when creating a personalized tiny home.
Choosing Materials and Embracing Sustainable Building Practices
My quest for sustainability started with scrutinizing every nail and board. Structural integrity and environmental impact demanded equal attention. Three core principles guided every choice: durability, efficiency, and responsible sourcing.

Comparing Wood, Steel, and Recycled Materials
Traditional wood framing offered familiarity but required chemical treatments. Steel provided superior stability in harsh weather, though costs ran 40% higher. My solution? A hybrid approach using reclaimed barn beams for interior walls and galvanized steel for the frame.
| Material | Cost/Sq Ft | Lifespan |
|---|---|---|
| Pine | $2.80 | 25 years |
| Steel | $4.10 | 50+ years |
| Recycled | $1.20 | Varies |
Roofing decisions proved critical. I chose standing-seam metal despite its $3,200 price tag—triple asphalt shingles. The trade-off? Wind resistance up to 140 mph and 50-year durability.
Incorporating Energy-Efficient and Eco-Friendly Solutions
Spray foam insulation became my thermal barrier champion. Though pricier than fiberglass, it eliminated air gaps in my 8’ ceilings. For utilities, a $450 greywater system redirects shower runoff to native plants.
Solar integration required tough choices. A 3kW system added $8,200 upfront but slashed monthly bills to $18. Complementing this with LED lighting and smart thermostats created an energy loop I monitor through phone alerts.
Water conservation features include:
- Low-flow showerhead (1.5 gpm)
- Dual-flush composting toilet
- Rain barrel collection for garden use
From Construction to Personalization: Bringing It All Together
Transforming raw walls into a lived-in sanctuary revealed the true magic of compact living. Every design choice now serves dual purposes, blending practicality with self-expression.
Installing the Final Touches
My sleeping loft became a prototype for vertical efficiency. Custom-built drawers under the stairs hold seasonal clothing, while magnetic spice racks double as wall art. Foldable furniture proved essential—my dining table collapses into a 6-inch wall profile when unused.
Creative storage solutions maximize every cubic foot. Window blinds transform into herb-drying racks, and bench seats conceal 18-gallon storage bins. Behind my sofa, a flip-up panel reveals shallow shelves for books and tech gear.
Outdoor additions extended my usable square footage. A 64-square-foot shed houses gardening tools and fitness equipment. Under the deck, I installed pull-out bins for firewood storage—perfect for chilly evenings.
These personalized elements make my 225-square-foot home feel expansive. By prioritizing multi-use features and clever organization, I’ve created a space that adapts to daily needs while reflecting my values. The journey from blueprint to lived-in house taught me that thoughtful details matter more than square feet.
FAQ
What zoning laws affect placing a compact dwelling on my property?
I discovered local ordinances often dictate minimum square footage, utility connections, and whether structures on wheels are allowed. Researching county-specific rules early saved me from costly redesigns later.
How do I estimate total costs for a custom small home?
My budget included land prep, materials like reclaimed wood or steel framing, permits, and labor. I added a 15% buffer for unexpected expenses like soil testing or upgraded insulation.
Can I use solar power and composting systems off-grid?
Yes! I installed photovoltaic panels and a waterless toilet to reduce reliance on public utilities. Check local codes—some areas require grid-tied systems even for secondary dwellings.
Are prefab kits worth considering versus DIY builds?
Kits streamlined my timeline but limited customization. For unique layouts, I’d recommend hybrid approaches—buying a trailer base but self-building the shell to balance cost and creativity.
How do I handle wastewater without sewer access?
I opted for a greywater recycling system paired with a permitted septic tank. Rainwater collection barrels supplemented my irrigation needs while staying compliant with regional environmental rules.
What’s the fastest way to find tiny-friendly land listings?
I combed through niche platforms like Tiny House Listings and connected with local Facebook groups. Networking at regional workshops also uncovered unadvertised lease opportunities.
Do lenders offer mortgages for sub-400 sq. ft. homes?
Traditional banks often decline, but I secured a personal loan through LightStream and explored RV-specific financing since my design met ANSI certification standards.