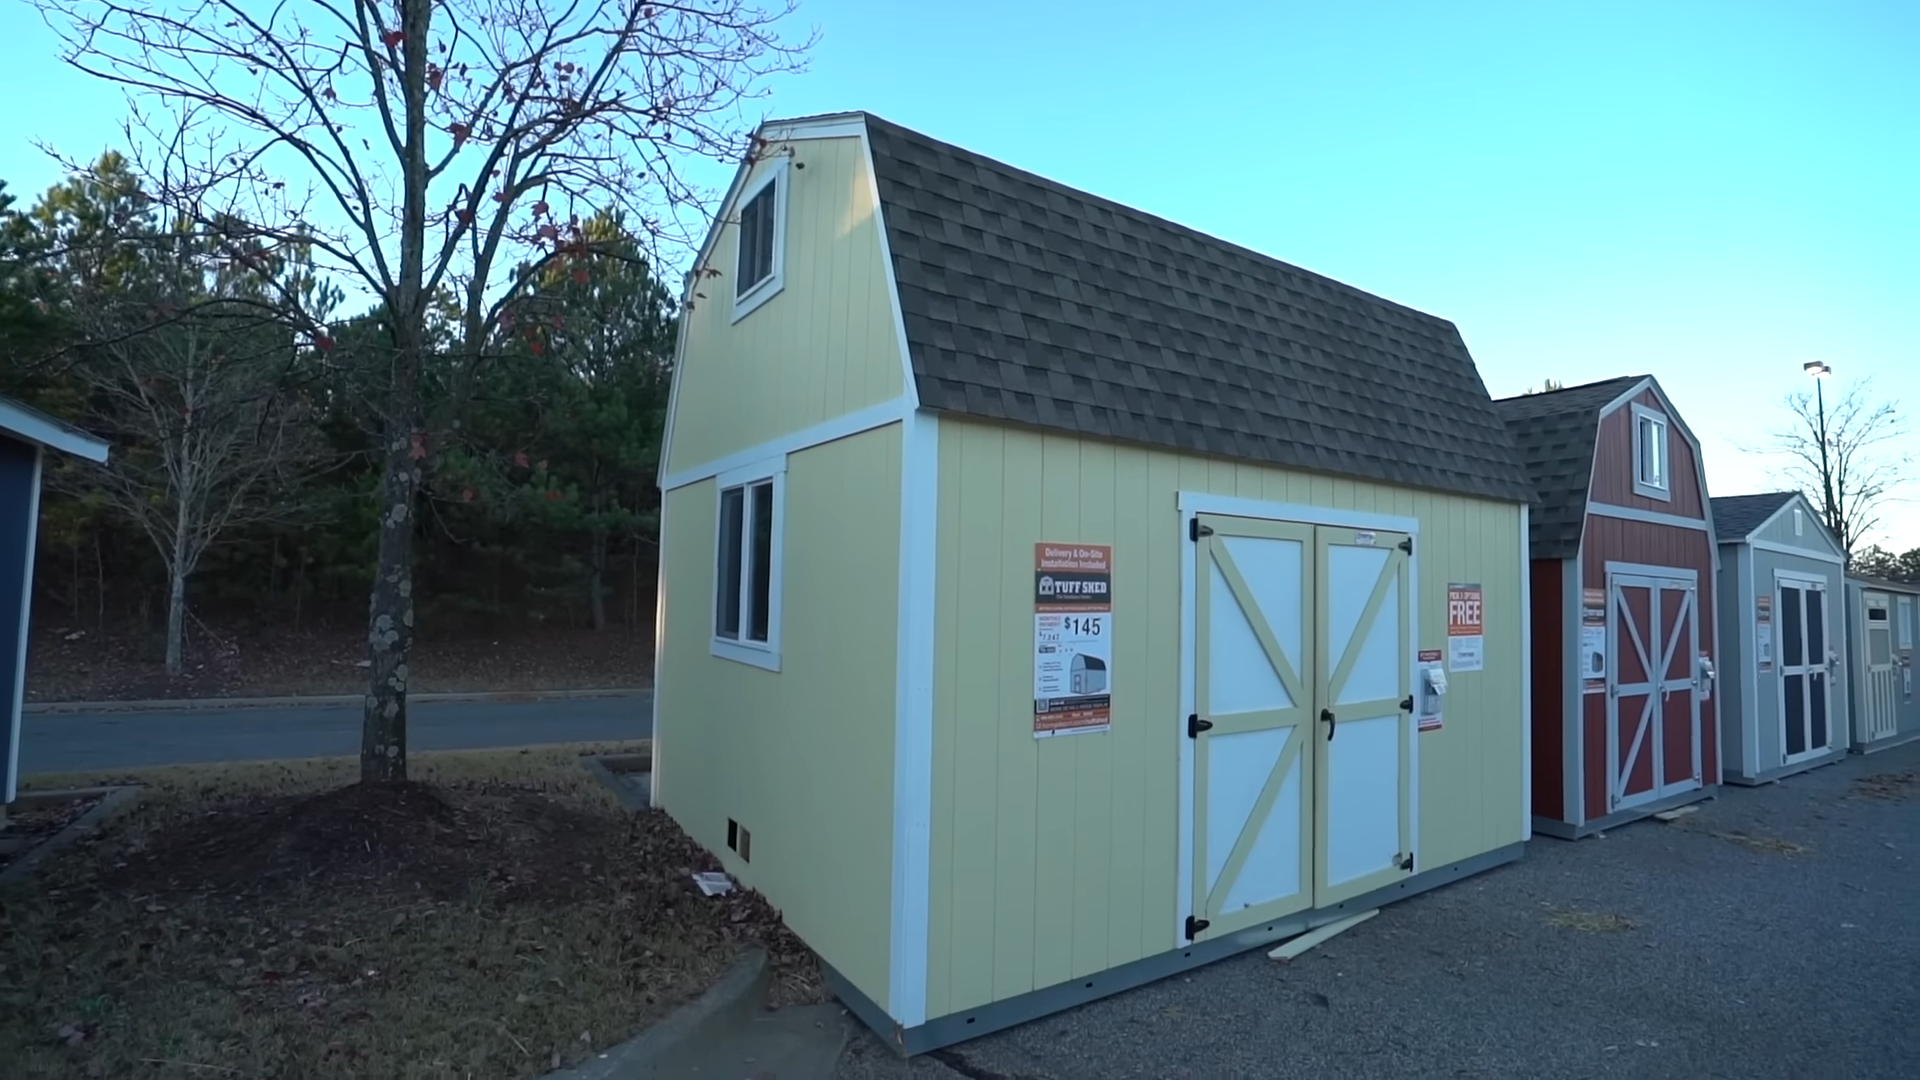
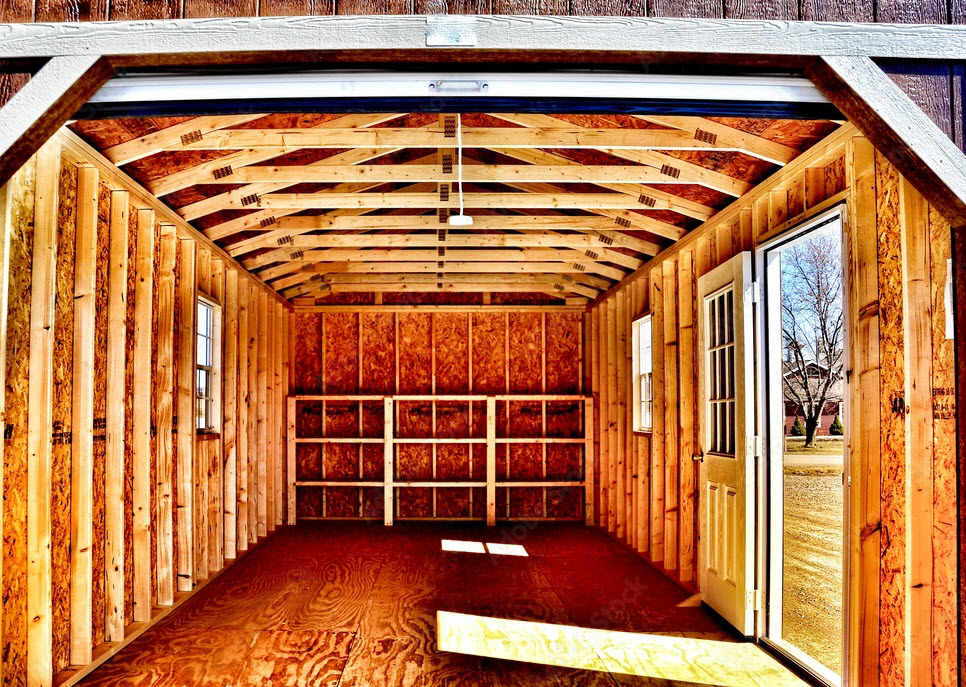
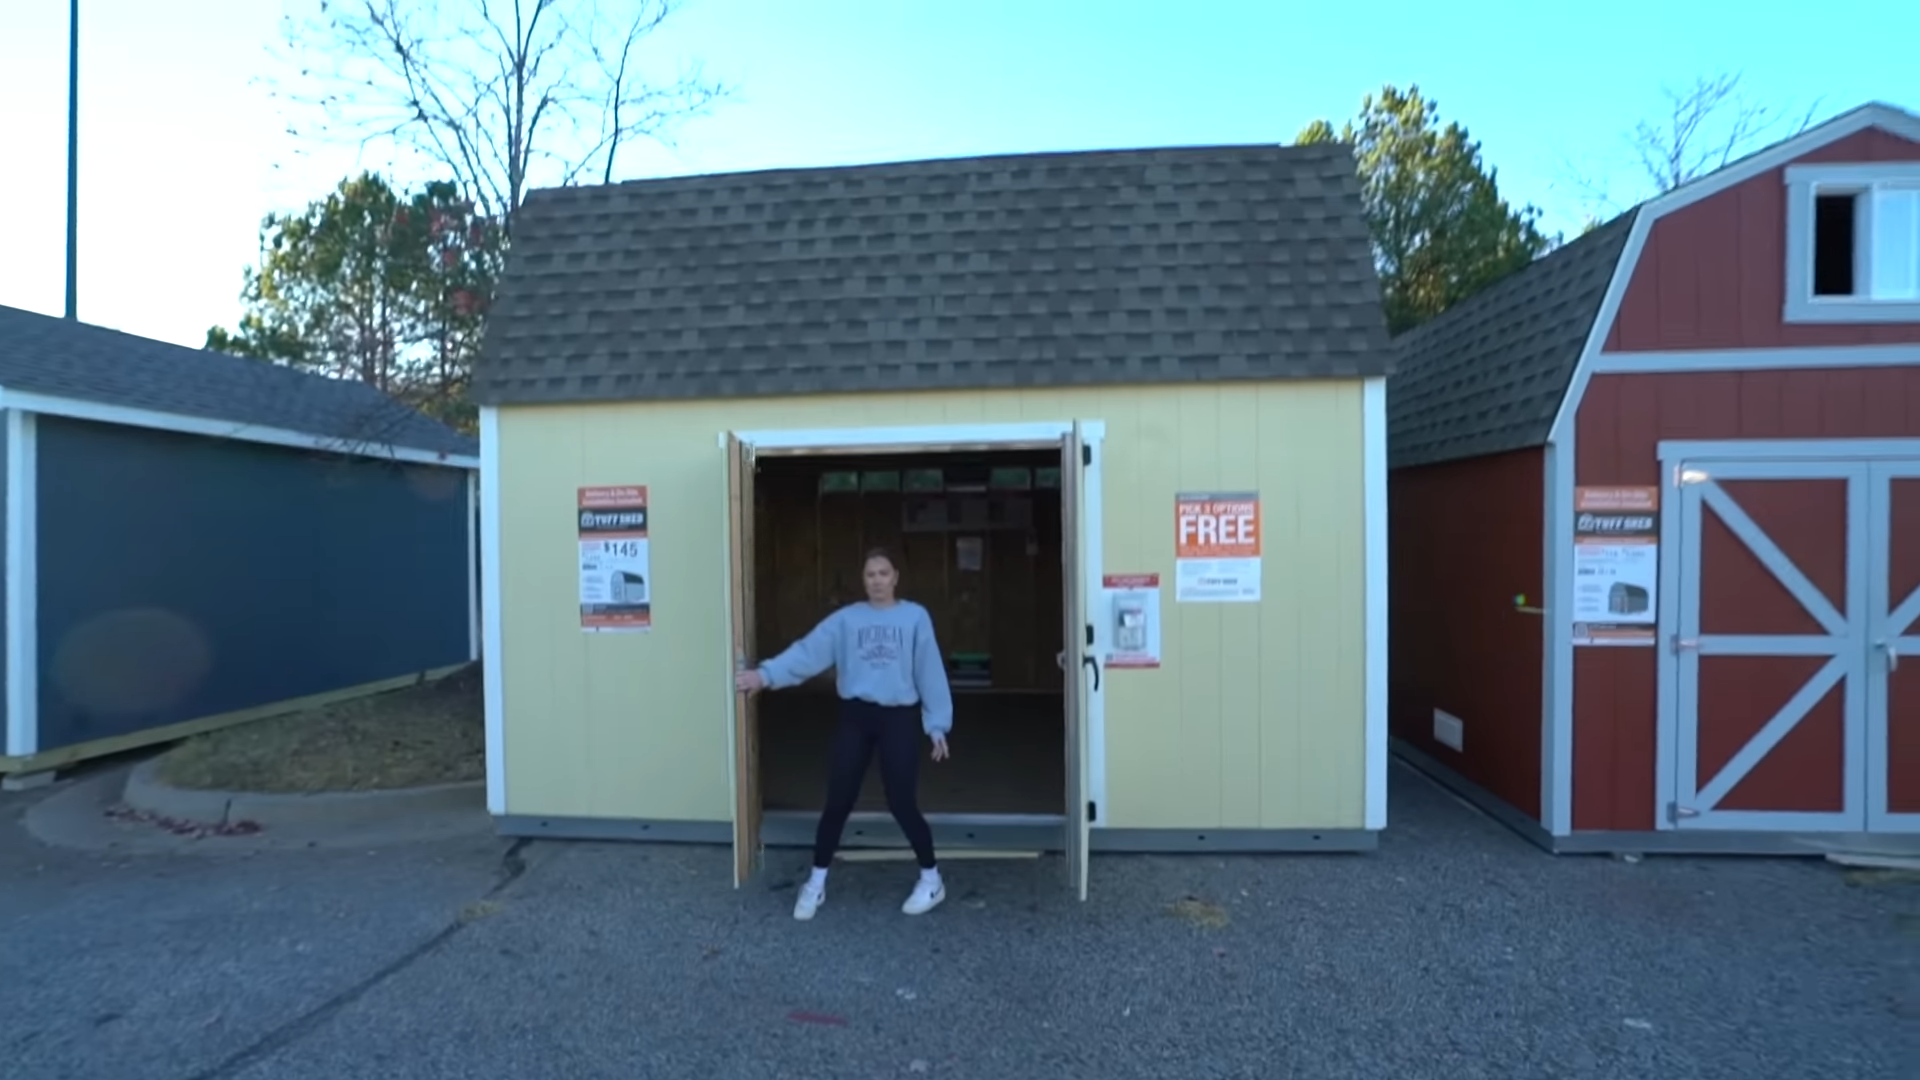
To save time and money, convert a storage shed into your tiny home.
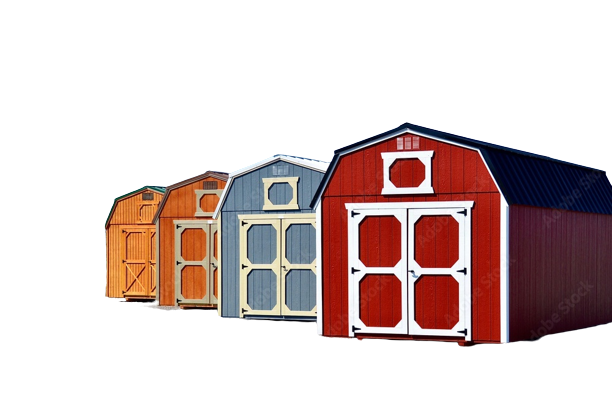
Is building a tiny house from a shed possible?
We’ve seen many successful builds and so the short answer is “absolutely”. Many people who saw the opportunity to own a cheap tiny house have built tiny houses from sheds. Continue reading to learn how you can transform a shed into an adorable tiny house.

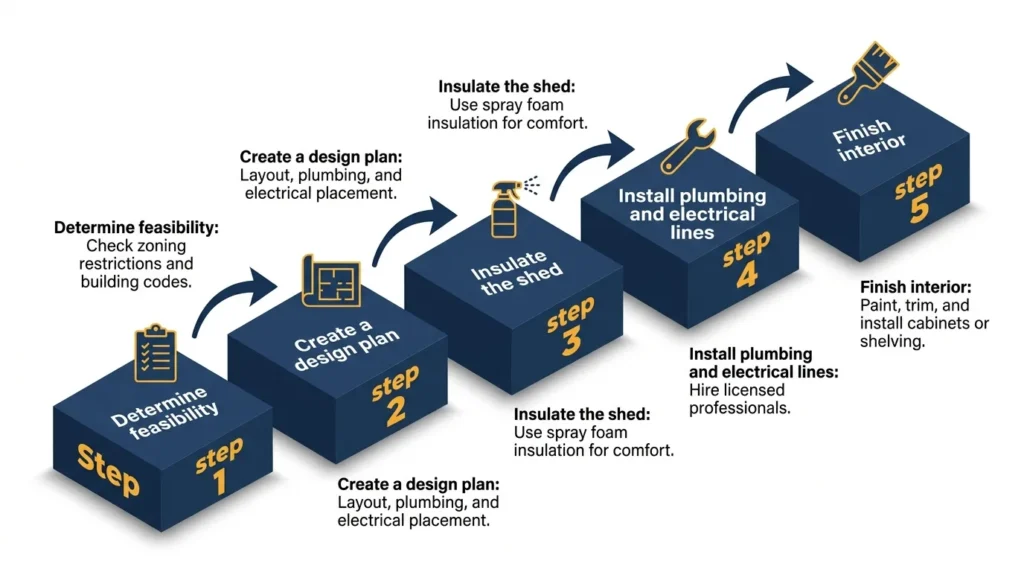
Converting a storage shed to a house can be a challenging task, but with the right planning and execution, it can be accomplished successfully. Here are the general steps that you can follow to convert a storage shed to a house:
Determine the feasibility of the project: Before beginning the conversion process, it’s important to make sure that the shed can be converted into a livable space. Check with your local building authority to determine if there are any zoning restrictions or building codes that may impact the conversion.
Create a design plan: Once you’ve determined that the conversion is feasible, it’s time to create a design plan. This plan should include the layout of the space, the placement of walls, doors, and windows, and the location of any necessary plumbing and electrical lines.
Insulate the shed: To make the shed livable, it’s important to insulate it properly. This will help regulate the temperature and keep the interior comfortable. Consider using spray foam insulation, which is a highly effective and efficient option.
Install plumbing and electrical lines: Depending on your design plan, you may need to install plumbing and electrical lines to make the space livable. This will likely require the services of a licensed plumber and electrician.
Install flooring: Once the insulation, plumbing, and electrical work are complete, it’s time to install the flooring. This can be any type of flooring that you choose, such as hardwood, tile, or carpet.
Install walls and ceilings: With the flooring in place, it’s time to install the walls and ceilings. This will likely require framing the space, installing drywall or other wall coverings, and finishing the walls and ceilings with paint or other materials.
Install doors and windows: With the walls and ceilings in place, it’s time to install doors and windows. This will help to provide natural light and ventilation to the space.
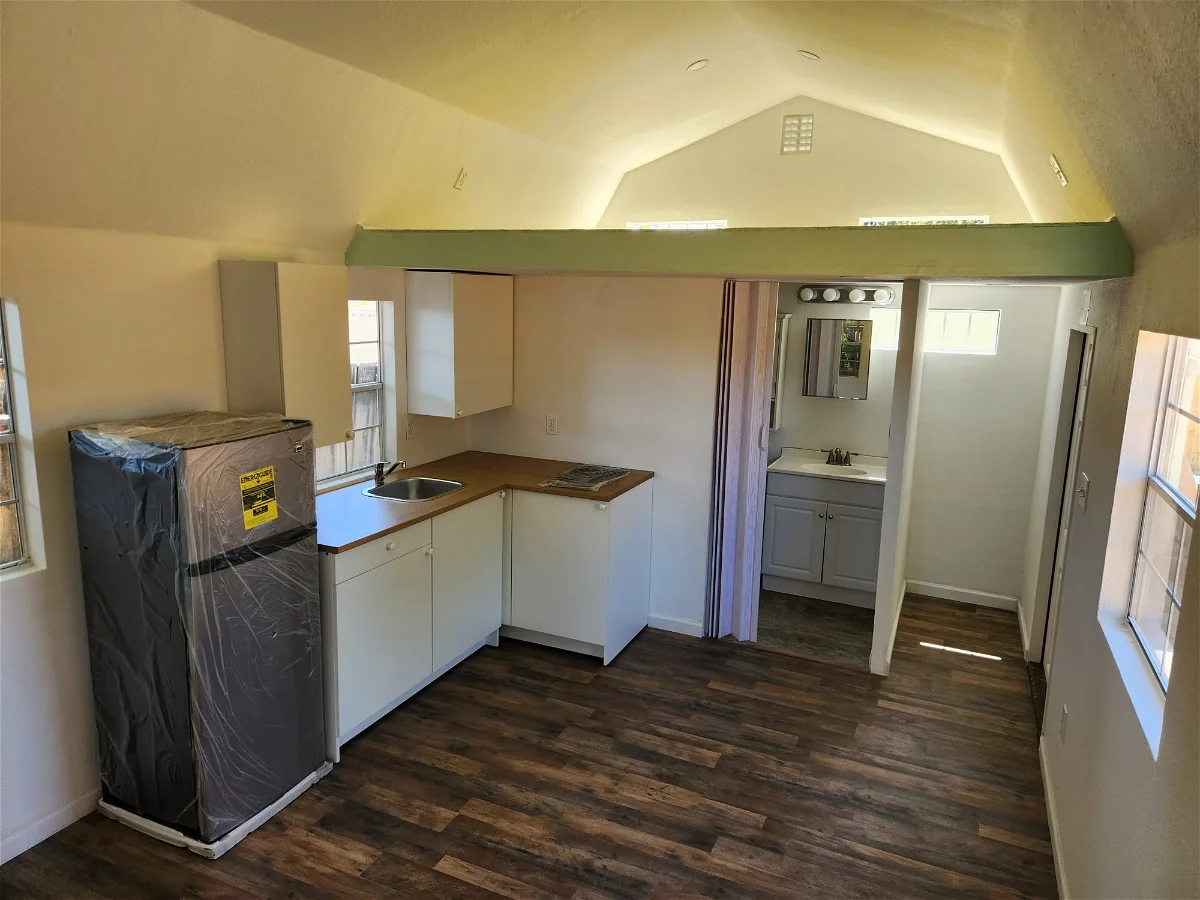
Install fixtures and appliances: To make the space livable, you’ll need to install fixtures and appliances, such as a bathroom sink, shower, toilet, kitchen sink, stove, and refrigerator.
Finish the interior: With all of the major components in place, it’s time to finish the interior. This may include painting, adding trim and molding, and installing any additional features, such as cabinets or shelving.
Obtain necessary permits and inspections: Before moving into the newly converted space, it’s important to obtain any necessary permits and inspections from your local building authority to ensure that the space is safe and up to code.
Overall, converting a storage shed to a house can be a complex process, but with careful planning and execution, it can be accomplished successfully.
Steps to converting a shed to a tiny house
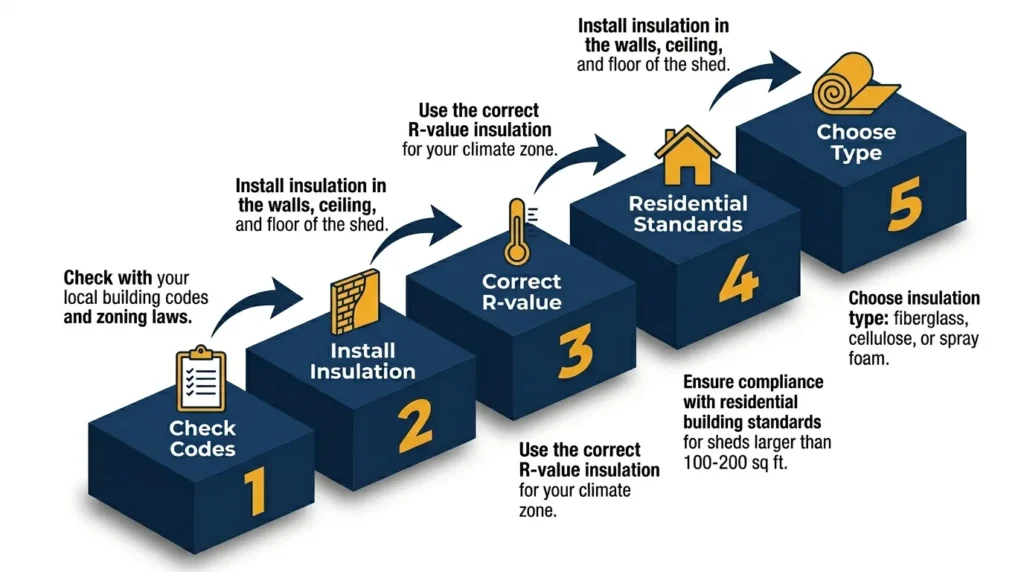
1. Check with your local building codes and zoning laws
First and foremost, it’s important to check with your local building codes and zoning laws to make sure that converting your shed into a livable space is allowed in your area. Some areas have specific regulations regarding the conversion of sheds into living spaces, so it’s important to check with the appropriate authorities before proceeding.
Local building codes and zoning laws in the US can vary depending on the location and the intended use of the shed structure. Here are some general guidelines to keep in mind:
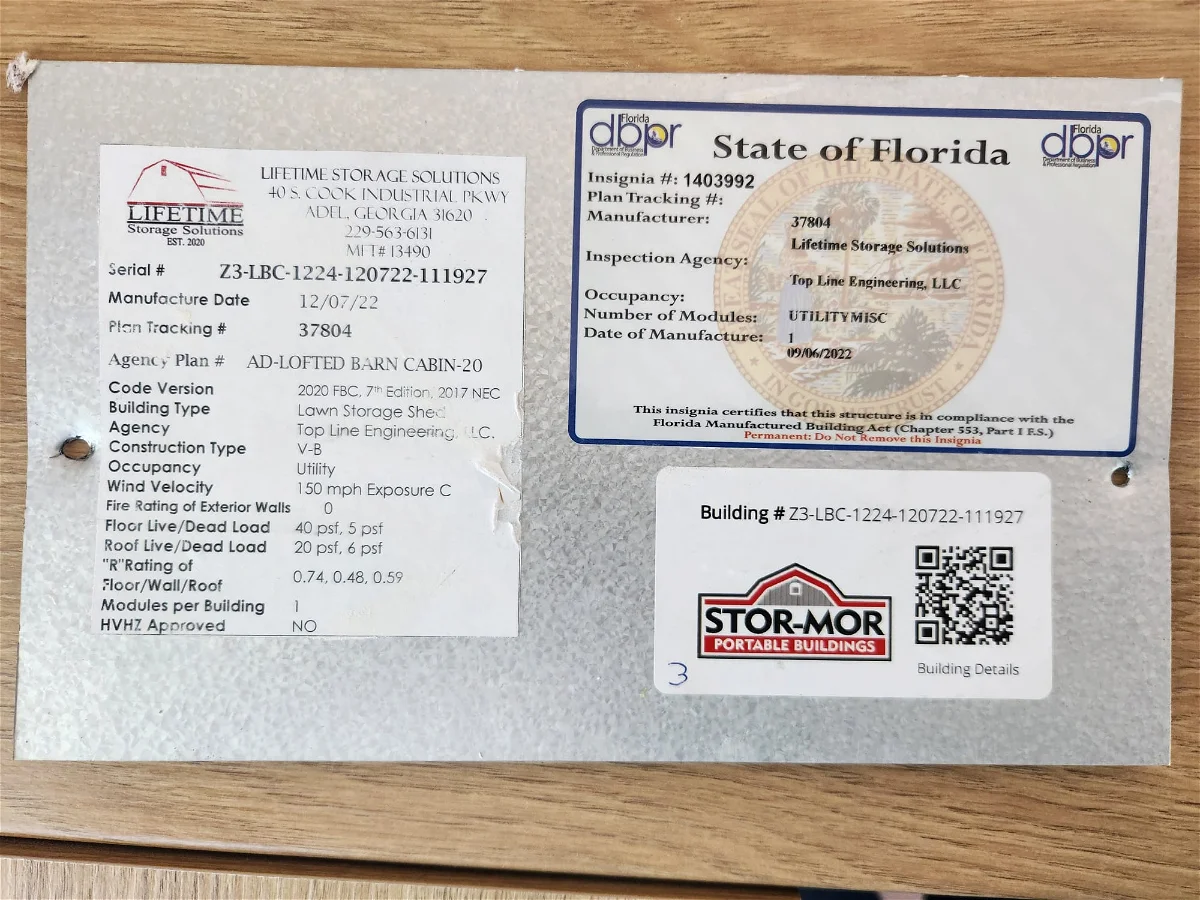
Building codes: Most local building codes in the US require sheds that are larger than a certain size (typically 100 to 200 square feet) to comply with the same building codes as residential structures. This may include requirements for the foundation, framing, roofing, windows and doors, insulation, electrical and plumbing systems, and other structural and safety features. It’s important to check with your local building department to determine what specific requirements apply to your shed.
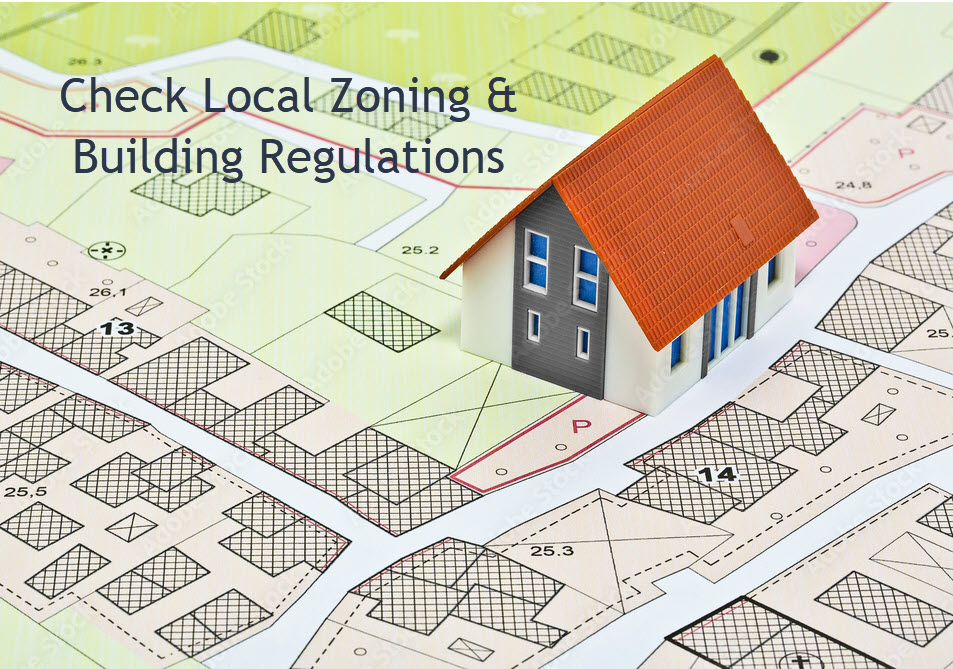
Zoning laws: Local zoning laws in the US can regulate the use of sheds on residential properties. Depending on the location and the intended use of the shed, you may need to obtain a permit or variance from your local zoning board. Some common restrictions may include limits on the size, height, placement, and distance from property lines or other structures.
Accessory dwelling units (ADUs): In some areas, sheds may be eligible for conversion into accessory dwelling units (ADUs), which are small, independent living units on the same property as a primary residence. Many local jurisdictions have specific requirements for ADUs, such as minimum lot size, maximum size and height, and parking requirements.
Overall, it’s important to check with your local building department and zoning board to determine what specific regulations apply to your shed structure and intended use. Failure to comply with local building codes and zoning laws can result in fines, legal issues, and safety hazards.
2. Installing insulation in your shed
Assuming you checked local zoning regulations as pointed out in step #1 and you found out that converting a shed to a tiny house is allowed in your state, here are some key considerations to keep in mind:
Insulation: If you’re going to be living in the shed, you’ll want to make sure that it’s properly insulated so that it stays warm in the winter and cool in the summer. This involves adding insulation to the walls, ceiling, and floor.
Insulation is key to keeping your living space comfortable, no matter what the temperature is outside. When converting a shed into a livable space, you’ll want to add insulation to the walls, ceiling, and floor. This will help to prevent heat loss in the winter and keep the space cool in the summer.
There are several types of insulation that you can use, including fiberglass, cellulose, and spray foam.
- Fiberglass insulation is a popular choice because it’s affordable, easy to install, and effective at reducing heat loss.
- Cellulose insulation is made from recycled paper and can be blown into walls and ceilings, making it a good choice for retrofitting existing spaces.
- Spray foam insulation is more expensive than other types, but it’s highly effective at reducing heat loss and can also help to seal air leaks.
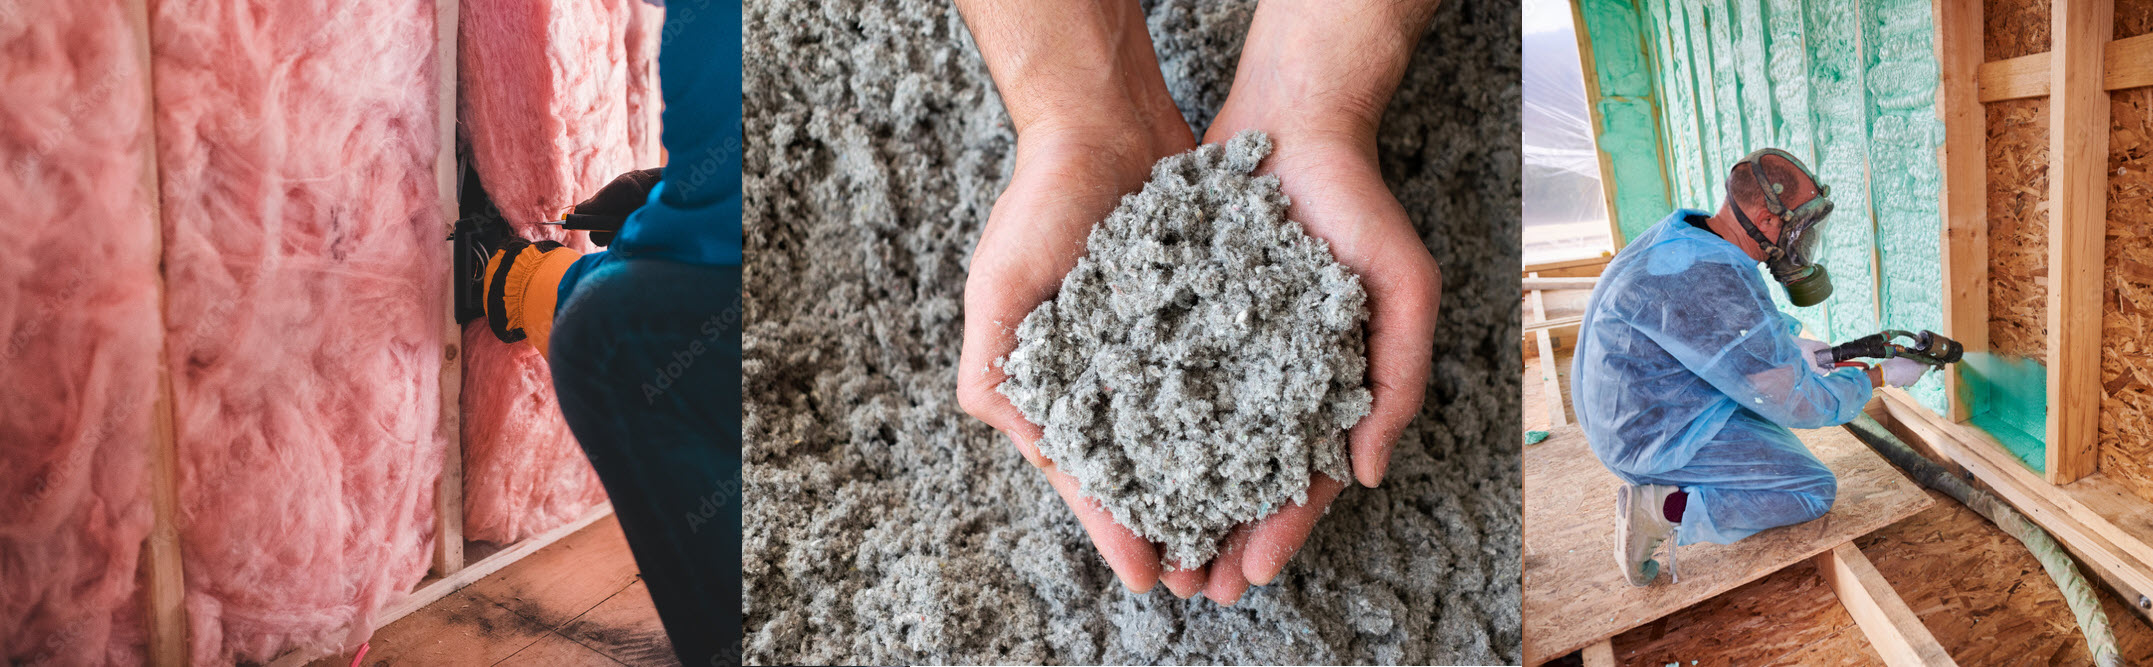
When installing insulation in your shed, it’s important to make sure that you’re using the correct R-value for your climate zone. The R-value is a measure of how well insulation resists heat flow, and higher R-values are needed in colder climates. Your local building codes will have specific requirements for R-values, so make sure to check with your local authorities before proceeding.
In addition to adding insulation, you may also want to consider adding a vapor barrier. A vapor barrier is a layer of material that helps to prevent moisture from getting into the insulation. This is especially important in colder climates, where moisture can condense inside the insulation and cause mold or other damage.
Overall, adding insulation is an important step in converting a shed into a livable space. It will help to keep your space comfortable and energy-efficient, and it’s a key consideration to plan for early in the conversion process.
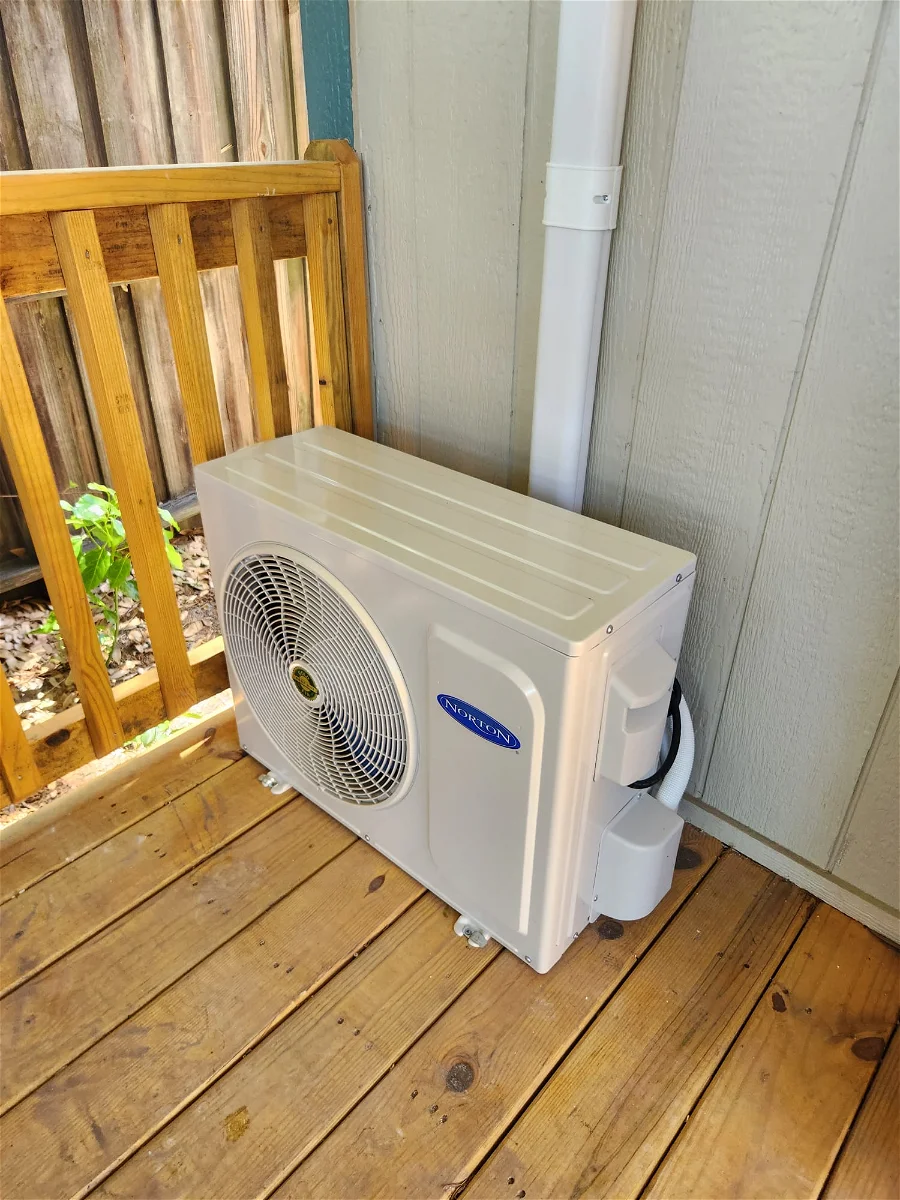
3. Electricity, wiring and outlets
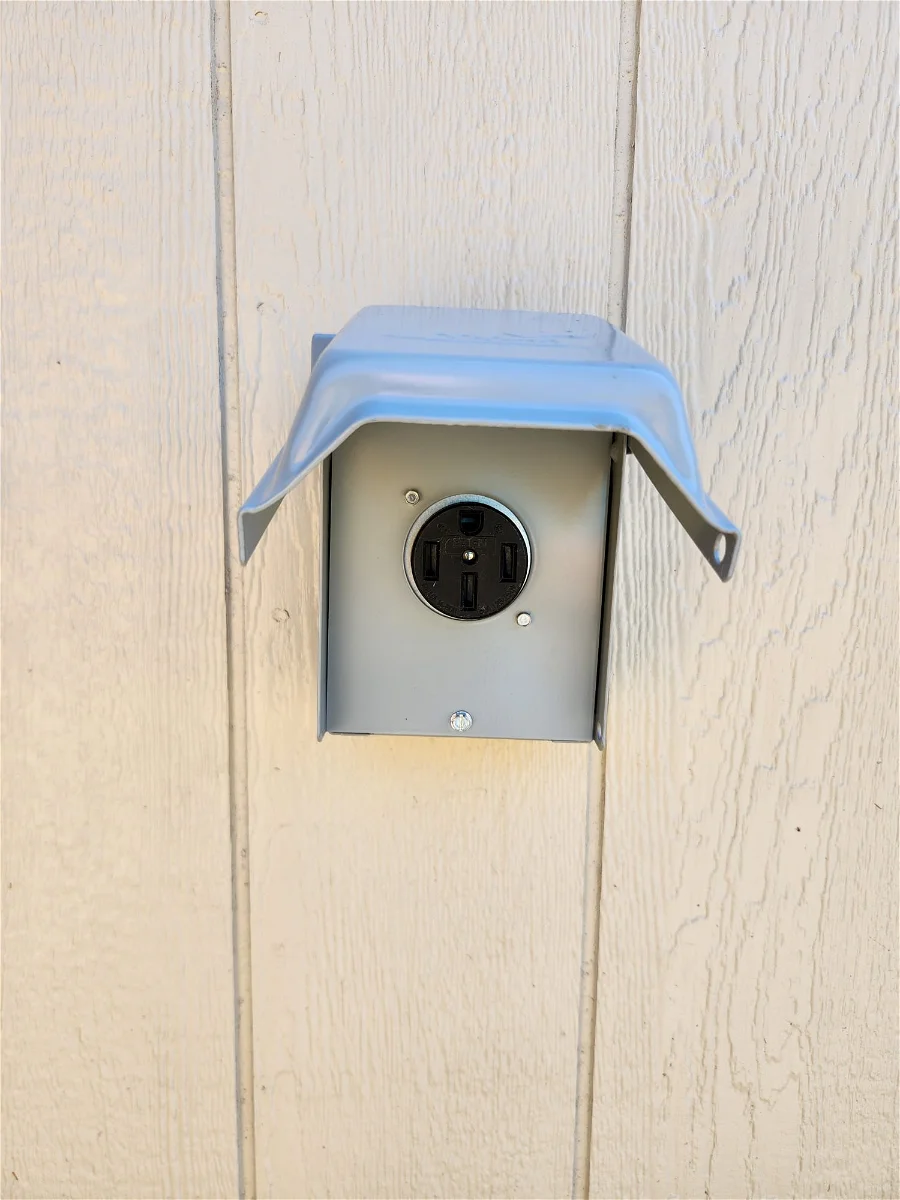
Electrical: You’ll likely want to have electricity in your new living space, so you’ll need to install wiring and outlets. Depending on the size of the shed and the electrical load you’ll be putting on it, you may need to upgrade the electrical service to the shed.
Safety: When it comes to electrical work, safety is paramount. If you’re not comfortable working with electricity, it’s best to hire a licensed electrician to do the work for you. Make sure that all electrical work is done in compliance with local building codes and regulations.
Capacity: Make sure that the electrical service to your shed is capable of handling the load of a livable space. This may involve upgrading the service from your main panel or adding a subpanel to the shed. Make sure that you have enough circuits and outlets to meet your needs.
Wiring: Rrun wiring from the electrical service to the outlets and switches in your shed. This may involve drilling holes in walls or running conduit on the exterior of the shed. Make sure that all wiring is done in compliance with local building codes and regulations.
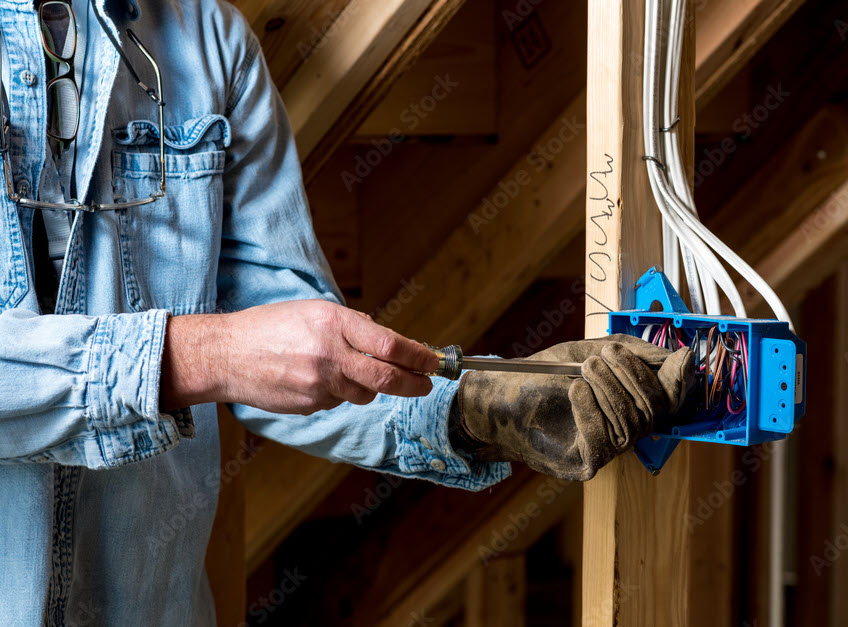
Outlets and switches: Plan out the placement of outlets and switches in your shed to make sure that they’re convenient and accessible. You’ll also need to make sure that they’re grounded and have the correct voltage rating.
Lighting: You’ll need to plan out the lighting in your shed, including overhead lighting and task lighting. You may want to consider installing dimmer switches or motion sensors to save energy.
Appliances: If you’re planning on adding appliances to your shed, such as a mini fridge or microwave, you’ll need to make sure that they’re compatible with your electrical service. You may need to run dedicated circuits for high-wattage appliances.
Overall, electrical work is a key consideration when converting a shed into a livable space. It’s important to plan out your electrical needs early in the process and make sure that all work is done safely and in compliance with local regulations.
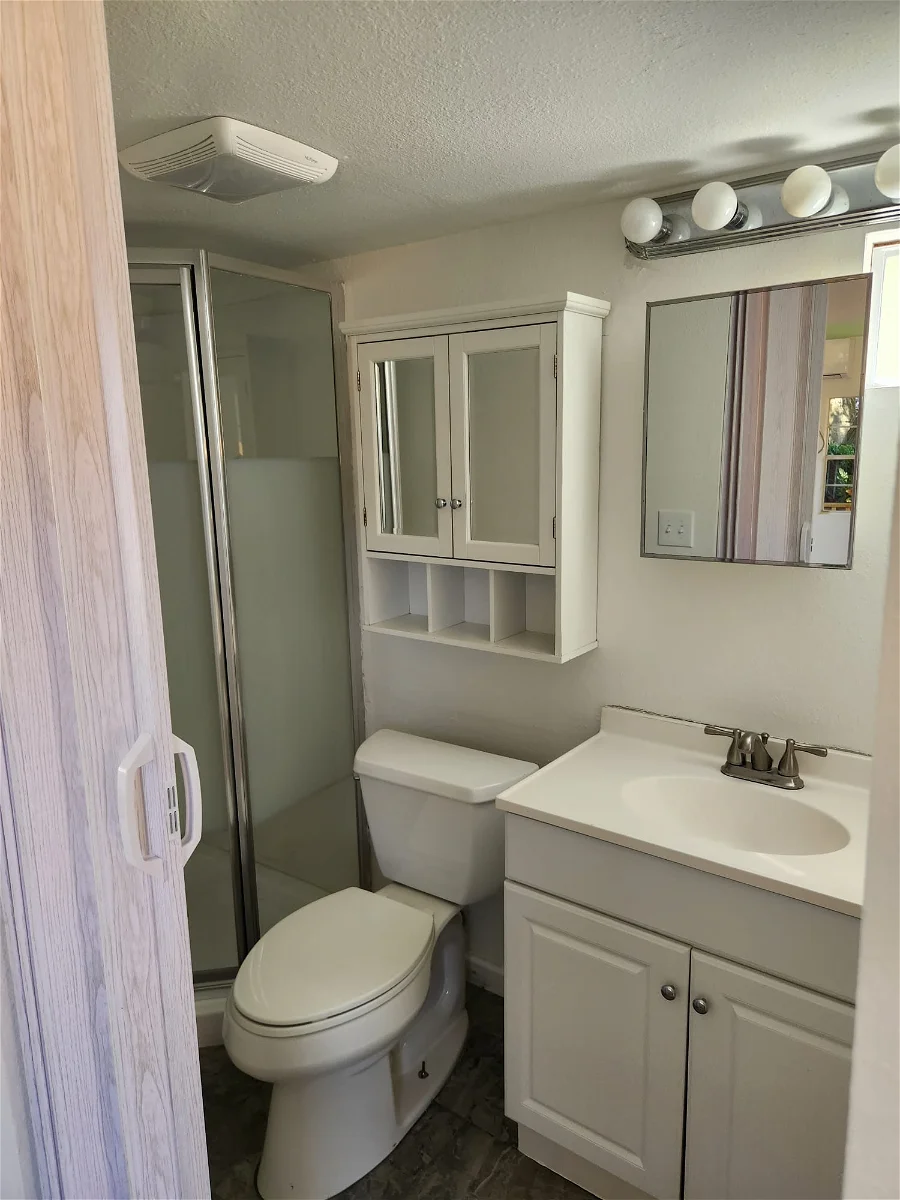
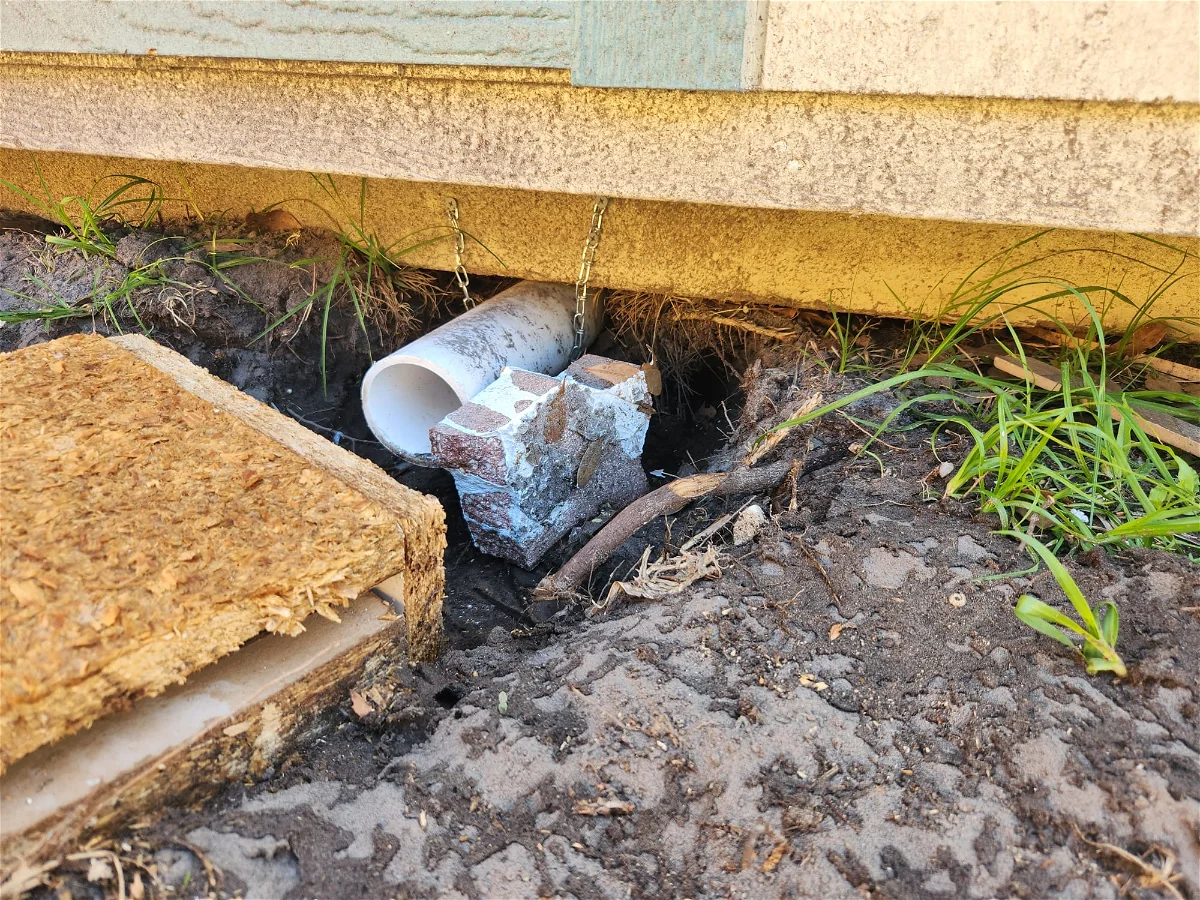
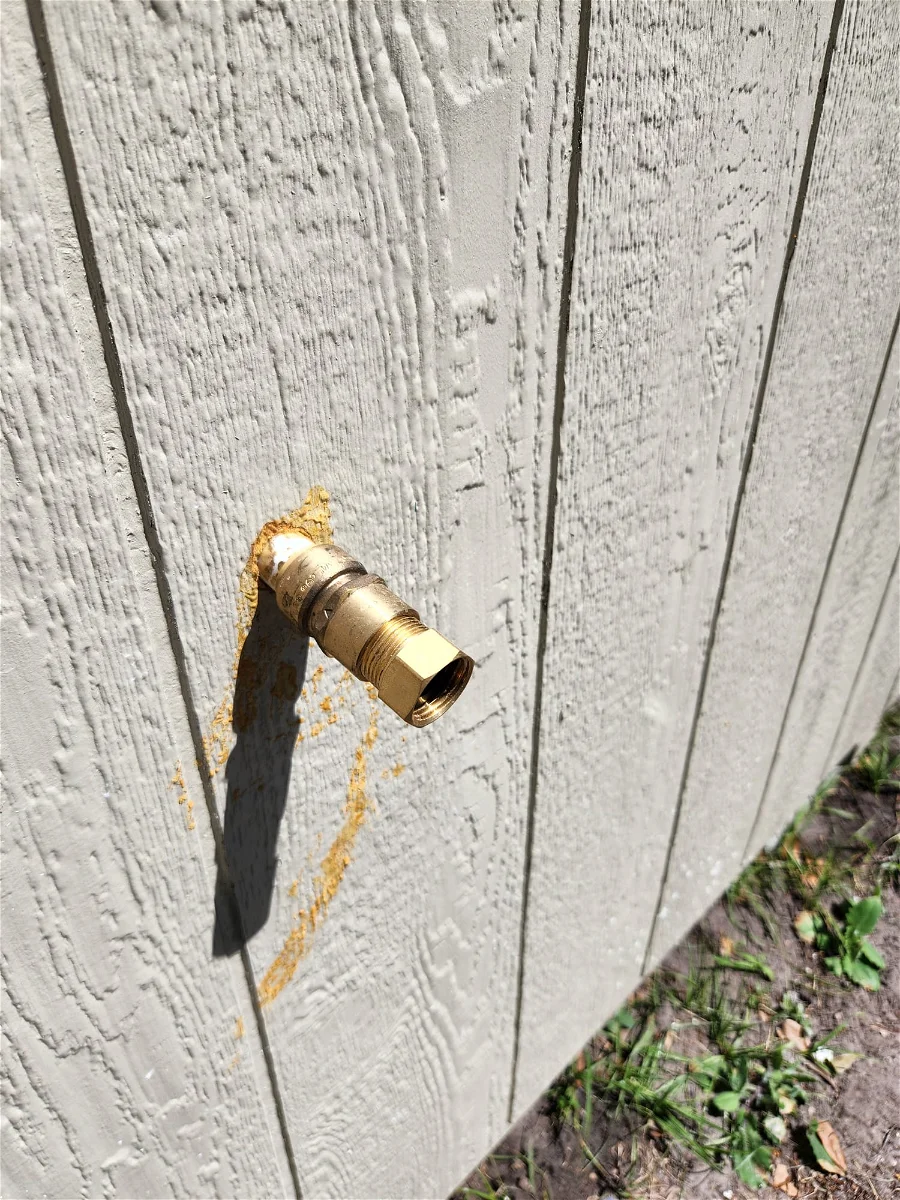
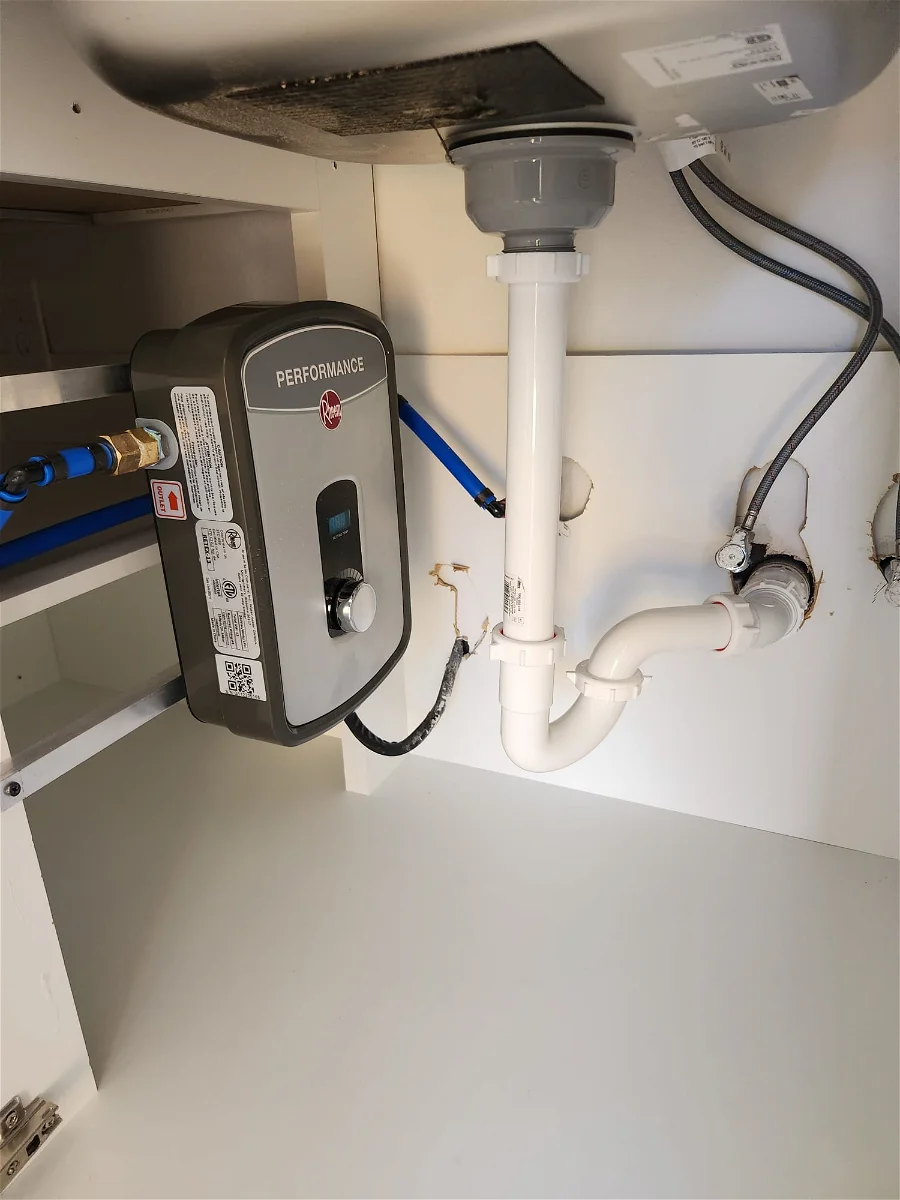
4. Plumbing, drainage and water
Plumbing: If you’re planning on adding a bathroom or kitchen to the space, you’ll need to run plumbing to the shed. This can be a bit more complicated than electrical work, as you’ll need to connect to your home’s existing plumbing system.
Water source: You’ll need a source of water for your shed, which may involve running a water line from your main house or installing a well if you’re in a rural area. Make sure that you’re complying with local regulations regarding water use and waste disposal.
Drainage: Plan for drainage in your shed, including installing a septic system or connecting to a municipal sewer line if necessary. Make sure that you have proper ventilation to prevent sewer gases from building up in your shed.
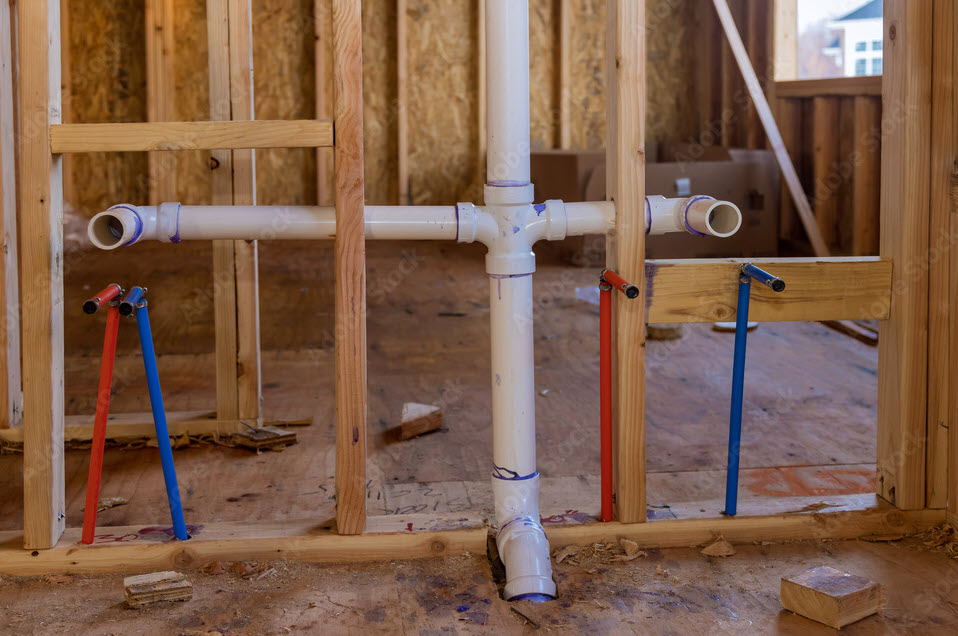
Fixtures: You’ll need to install plumbing fixtures in your shed, including a sink, toilet, and shower or bathtub if desired. Make sure that you’re using fixtures that are appropriate for the size of your shed and that you’re complying with local regulations regarding water use and waste disposal.
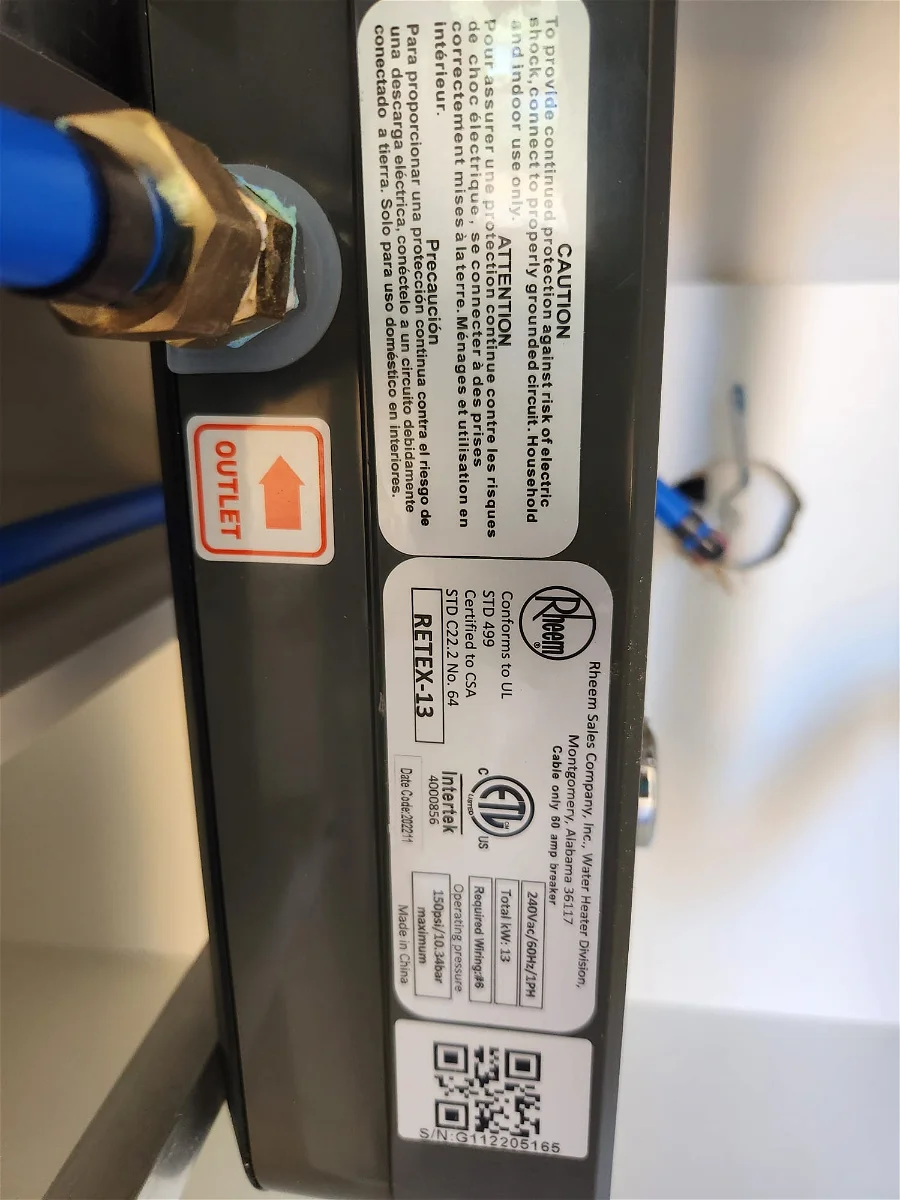
Hot water: This may involve installing a tankless water heater or connecting to a water heater in your main house. Make sure that you’re complying with local regulations regarding hot water temperature and energy efficiency.
Plumbing materials: When installing plumbing in your shed, make sure that you’re using materials that are appropriate for the intended use and that comply with local regulations. For example, copper or PEX tubing may be used for water supply lines, while PVC or ABS piping may be used for drain lines.
Maintenance: Proper maintenance is important for keeping your plumbing system functioning properly and preventing leaks or other issues. Make sure that you’re performing regular inspections and addressing any issues promptly.
Overall, plumbing is an important consideration when converting a shed into a livable space. Make sure that you’re complying with local regulations and using appropriate materials, and plan for regular maintenance to keep your plumbing system functioning properly.
5. Structural upgrades to ensure that it’s safe and stable as a living space
Structural considerations: Depending on the age and condition of the shed, you may need to make structural upgrades to ensure that it’s safe and stable as a living space. This may involve adding additional support beams, reinforcing the roof, or making other changes.
Foundation: The foundation of your shed will need to be strong and level to support the weight of the new living space. Depending on the size and condition of your shed, you may need to reinforce or replace the existing foundation.
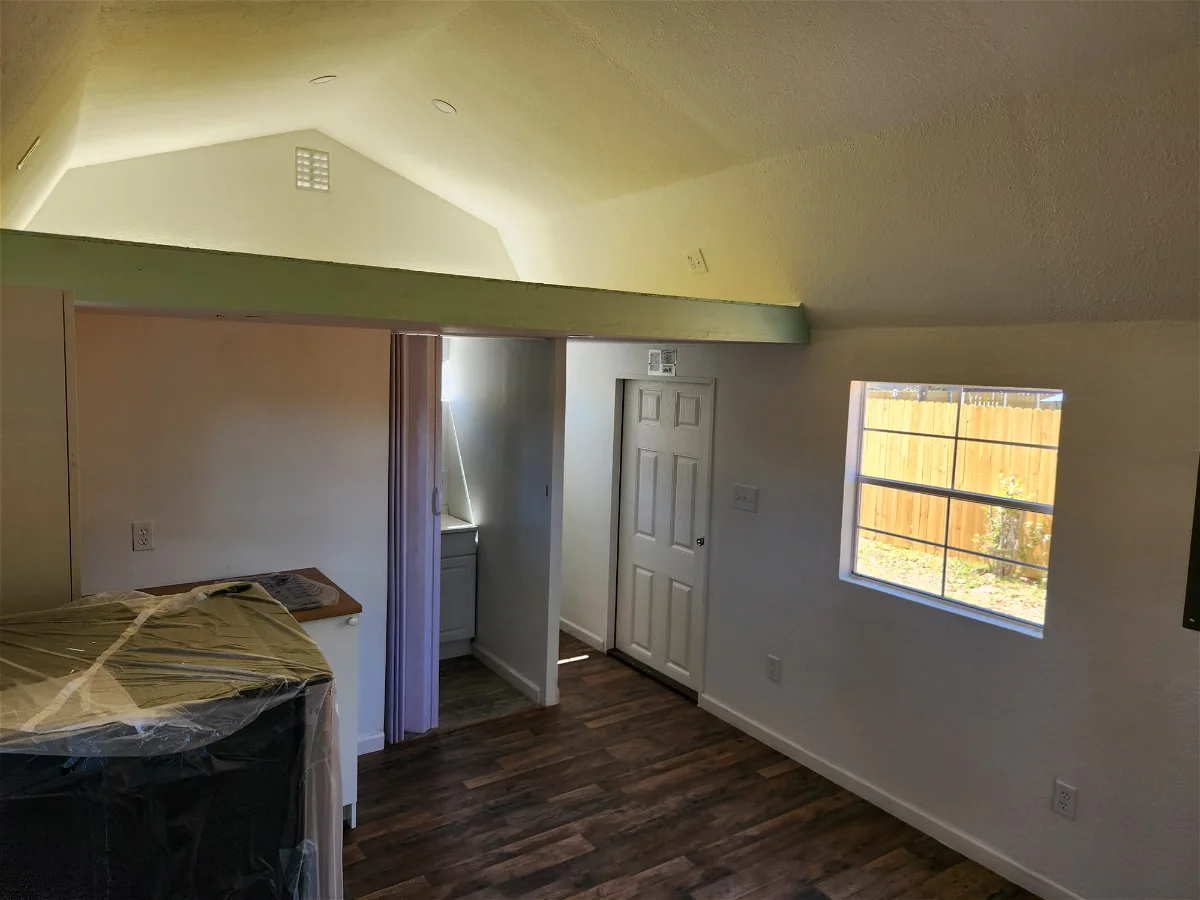
Framing: Frame the interior walls of your shed to create separate rooms and provide support for the roof and ceiling. Make sure that you’re using appropriate framing materials and techniques for the intended use and that you’re complying with local building codes and regulations.
Roofing: The roof of your shed will need to be strong and weather-resistant to protect your new living space from the elements. Depending on the condition of your existing roof, you may need to reinforce or replace it to ensure proper support and protection.
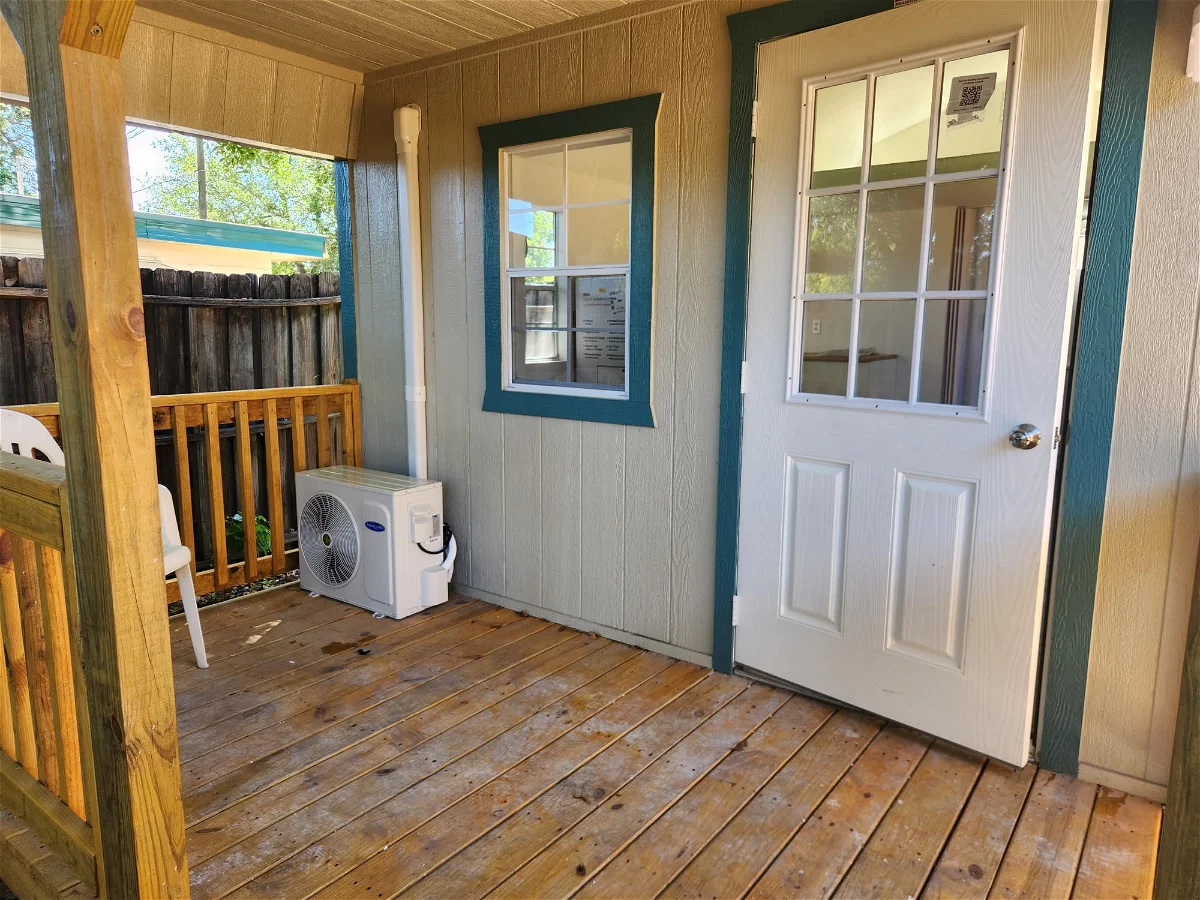
Windows and doors: Add windows and doors to your shed to provide natural light and ventilation and to create separate entry and exit points for the living space. Make sure that you’re using appropriate window and door sizes and styles for the intended use and that you’re complying with local building codes and regulations.
Overall, structural considerations are an important part of converting a shed into a livable space. Make sure that you’re using appropriate materials and techniques, complying with local building codes and regulations, and ensuring that your new living space is safe, comfortable, and functional.
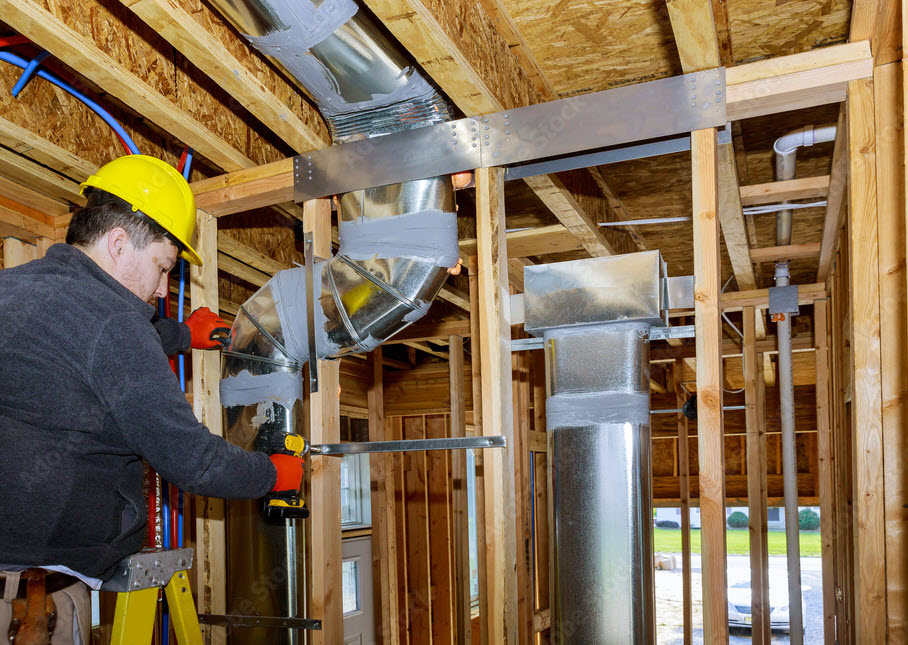
6. Adequate ventilation
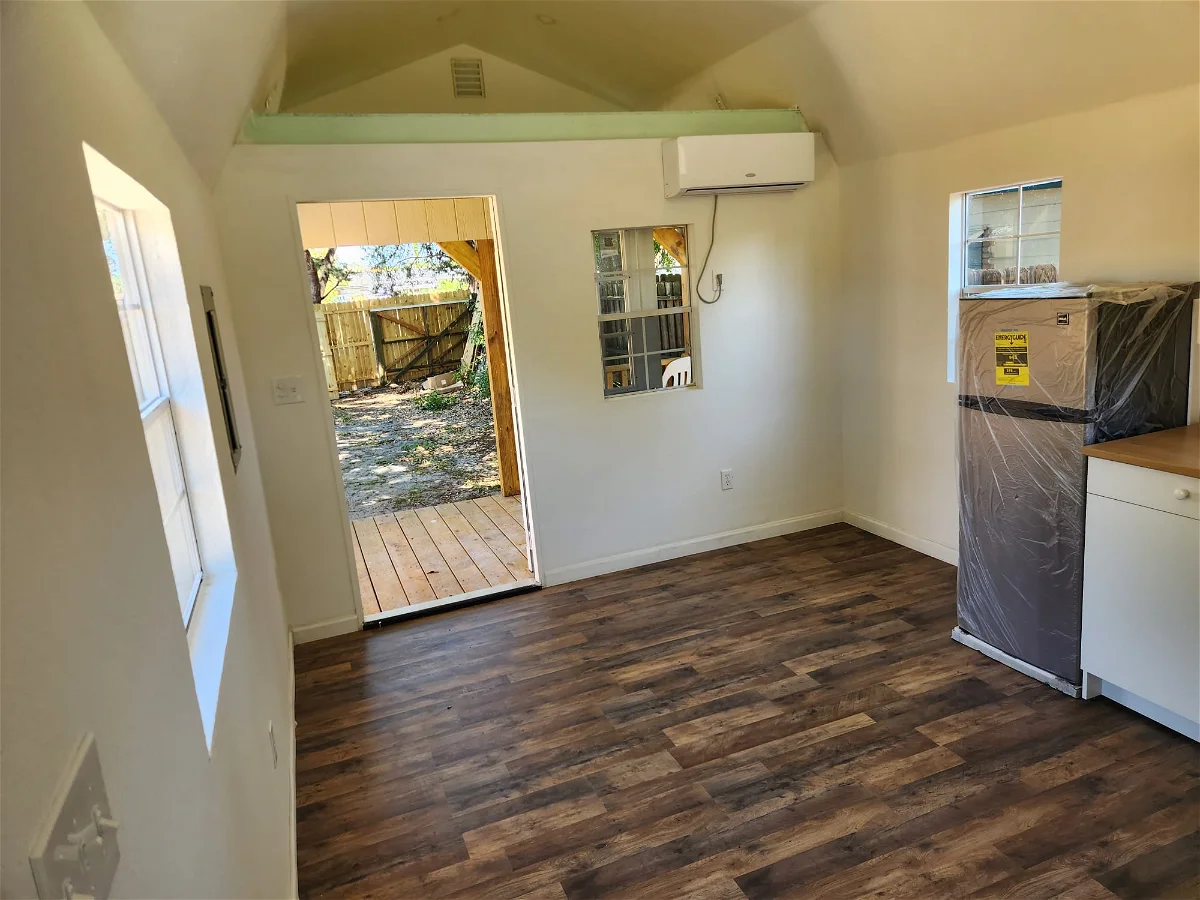
Ventilation: Adequate ventilation is important for any living space, so you’ll need to make sure that the shed has proper ventilation. This may involve adding windows, vents, or a ventilation system.
Airflow: There should be adequate airflow in your shed to prevent stagnant air and promote healthy indoor air quality. This may involve adding windows, vents, or a fan to improve ventilation.
Moisture control: Proper ventilation can also help to control moisture levels in your shed, which is important for preventing mold and mildew growth. You may want to consider adding a dehumidifier if you live in a humid climate.
Insulation: As mentioned earlier, adding insulation is important for keeping your shed comfortable, but it’s also important for ventilation. Make sure that you’re using insulation with a vapor barrier to prevent moisture from getting trapped inside the walls.
Natural ventilation: Adding windows or vents can help to improve natural ventilation in your shed. Make sure that windows are positioned to take advantage of prevailing breezes and that vents are positioned to allow for proper air exchange.
Mechanical ventilation: If natural ventilation isn’t sufficient, you may want to consider adding a mechanical ventilation system, such as a heat recovery ventilator (HRV) or energy recovery ventilator (ERV). These systems help to exchange indoor and outdoor air while recovering heat or energy.
Carbon monoxide detectors: If you plan on using gas-powered appliances, such as a propane heater or stove, you’ll want to install carbon monoxide detectors in your shed to prevent carbon monoxide poisoning.
Overall, ventilation is an important consideration when converting a shed into a livable space. Make sure that you’re taking steps to promote healthy indoor air quality and prevent moisture buildup, and consider adding a mechanical ventilation system if natural ventilation isn’t sufficient.
7. Interion Design
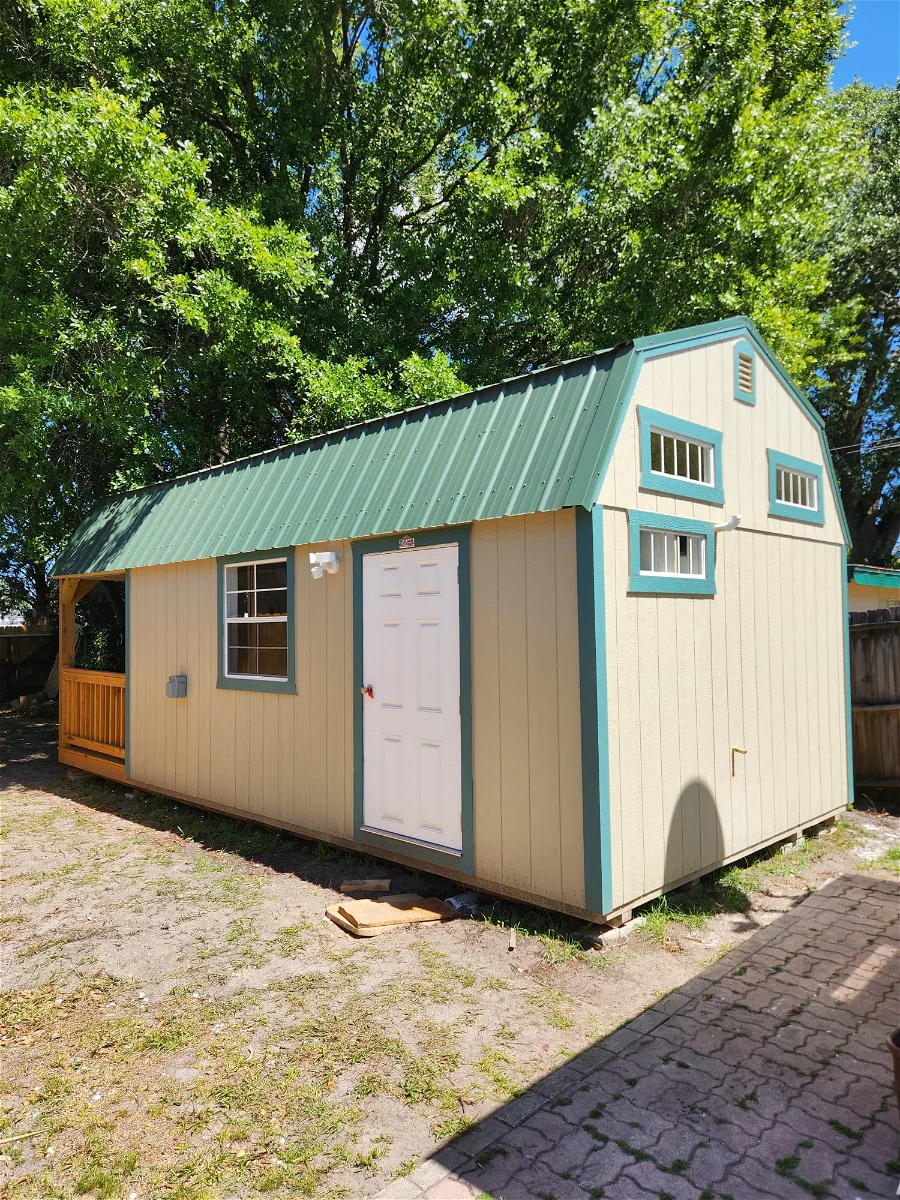
Finally, don’t forget about the interior design of your new living space! It should be comfortable, functional, and aesthetically pleasing. This may involve adding flooring, painting the walls, installing cabinets, and more.
Converting a shed into a livable space can be a great way to add extra living space to your home, but it’s important to make sure that you do it safely and legally. With the right planning and preparation, however, you can create a comfortable and functional living space that you’ll love.
Here are some key interior design points to keep in mind:
Layout: The layout of your new living space will depend on the size and shape of your shed and your personal preferences. Consider how you want to divide the space into different rooms, such as a living room, bedroom, kitchen, and bathroom, and how you want to arrange furniture and other items.
Lighting: Lighting is important for creating a comfortable and functional living space. Natural lighting should be available in your shed, such as windows and skylights, and think of how you want to supplement it with artificial lighting, such as ceiling fixtures and LED lights.
Flooring: The type of flooring you choose for your new living space will depend on your personal preferences and the intended use of the space. Some popular options include hardwood, laminate, tile, and carpet.
Color scheme: Choosing a color scheme for your new living space can help create a cohesive and inviting look. Consider using light colors to make the space feel larger and brighter, and choose accent colors to add interest and personality.
Storage: Storage is important for keeping your new living space organized and clutter-free. Consider incorporating built-in storage, such as shelves and cabinets, and choosing multi-functional furniture, such as a bed with built-in drawers.
Accessibility: If you or anyone who will be using the space has mobility limitations, it’s important to consider accessibility when designing the interior. This may involve adding ramps, widening doorways, and installing grab bars or other assistive devices.
Overall, interior design considerations are key part of converting a shed into a livable space. Make sure that you’re creating a comfortable and functional living space that reflects your personal style and meets your needs.
Why build a tiny house out of a shed?
You might choose to build a tiny house shed for many reasons, some of them are:
Top 5 benefits to converting a storage shed into a house.
Cost savings: Building a new house from scratch can be expensive. Converting a storage shed into a house can be a cost-effective way to create a living space without breaking the bank.
Customization: With a storage shed conversion, you have the opportunity to design and customize your living space to your exact specifications. This can be especially appealing if you have specific needs or preferences that might not be met by a standard home design.
Sustainability: Repurposing an existing structure instead of building a new one can be more environmentally friendly, as it reduces the need for new materials and can help keep construction waste out of landfills.
Convenience: Depending on the size of the shed, it may already have some of the infrastructure in place for a living space, such as electrical wiring or plumbing. This can make the conversion process faster and more convenient than building from scratch.
Mobility: Depending on the type of shed you’re converting, it may be possible to move it to a new location if you need to. This can be a convenient option if you want to live in a certain area but can’t find an existing home that meets your needs.
In Conclusion
Well, the key takeaways and conclusions based on the information we’ve gathered about the step to convert a shed into a livable tiny house space are:
Converting a shed into a livable space can be a cost-effective way to create extra living space on your property, but it requires careful planning and consideration of structural, design, and legal factors.
Structural considerations include ensuring the shed is structurally sound, assessing electrical and plumbing needs, and ensuring the space is properly insulated and ventilated.
Design considerations include creating a functional layout, incorporating adequate lighting and storage, and choosing a color scheme and flooring that complements the space.
Legal considerations include checking local building codes and zoning laws to ensure compliance, obtaining necessary permits and variances, and following regulations for accessory dwelling units where applicable.
Converting a shed into a livable house can provide many benefits, such as creating your own tiny house without having to hire a building crew, it could be your guest house, office space, or rental unit, but it requires careful planning and execution to ensure a safe, comfortable, and legal living space.
In conclusion, converting a shed into a livable space can be a worthwhile investment if done properly, but it’s important to take the time to carefully consider all the factors involved and to seek the advice of professionals where necessary.
Shed Frequently Asked Questions
Most frequent questions and answers
Do sheds speed up the build?
Tiny house shells are a great way to speed up your build time. You may need to move quickly if you work full-time or live in an area that has a challenging climate. A shed can be converted into a tiny house shed, which will reduce your build time and allow you to move in much faster.
Your tiny shed will be ready for you in no time. This is a far better speed than the months it would take to build one from scratch. Also, you won’t have to make rookie mistakes that will need to be undone.
Are They Less Expensive?
You might be able buy a shed that is suitable for your needs for less than what you would spend on a house shell. The manufacturing industry has mastered shed building. Their processes are efficient and streamlined, and they can buy their materials wholesale. This means that you will be able to get a better-quality product at a fraction of the cost it would take to build a frame from scratch. For example you can buy a storage shed that can be converted into a tiny home that is affordable and is one of the best way to save money on construction.
Building a tiny house may be more expensive.
If you don’t have much experience in construction, pre-built shed you purchase will likely be better than any tiny house shell that you can build. Prefab manufacturers have engineers and they know how to build sheds. Just because you will have the assurance that your tiny house structure or shell has been built by experts, in some cases it may be worth spending more. When you are building your tiny house from scratch you will most likely make mistakes and fixing those mistakes can be hard or costly. Buying something that is pre-made will reduce that chances of damaging your tiny house. Since you will be buying prefab structure makes sense to ask the manufacturer to provide warranty or guarantee for the pre-fabricated tiny house shed. This will provide you with peace of mind, and could even save you money down the line.
You may be eligible for financing.
It can be difficult to obtain financing for projects or things most people don’t know about. A bank may be happy to loan you money to purchase or build a home, but they are likely to be happy or willing to finance a tiny house.
Everyone knows what a shed looks like. Some shed manufacturers offer financing options. You don’t have to wait until you have enough money for a tiny house. Getting financing to purchase a shed can turn your dreams into reality sooner and much easier.
Can I turn a shed into a tiny house?
A storage shed that can be converted into a tiny home could be the right choice for you if time, money or skills are limited. However, this will mean that you have less control over the design of your tiny home. A shed might not be the best option if you value customization.
You won’t have much control over how your tiny home looks if you start with a shed. Your internal layout will need to be designed around the shed. You should research all options, but if there is a specific layout or style you are looking for, an out-of the-box solution won’t work.
A shed may not be the best choice if you intend to tow your small house around a lot.
If you are expecting to be mobile, keep in mind that sheds are not meant to be pulled across the country like tiny houses that are built on wheels. Before you purchase a shed, make sure it is fit for purpose. It should be strong enough to sustain wind, rain, flooding and that you can actually live in that shed and also double check there shouldn’t be any restrictions on how it can be used. Before you buy it, find a trailer that will fit it. The Shed Option by Tiny House Design is a great resource if you are considering buying a shed pre-made. This article provides a checklist of questions and guidelines to consider when considering sheds.